• Home
  • Blog
  • Basics + Pantry Staples
  • Preservation
  • Desserts & Sweets
  • Breakfast
  • Entrees & One-dish Meals
  • Salads + Sides
  • Soups & Stews
  • 10 Minute Recipes
  • About
  • Say Hello
  • Portfolio
Menu

of the dirt

Street Address
San Diego, CA
Phone Number
an exploration of food and culture

Your Custom Text Here

of the dirt

  • Home
  • Blog
  • Recipes
    • Basics + Pantry Staples
    • Preservation
    • Desserts & Sweets
    • Breakfast
    • Entrees & One-dish Meals
    • Salads + Sides
    • Soups & Stews
    • 10 Minute Recipes
  • About
  • Say Hello
  • Portfolio

Orange Blossom & Hazelnut Teacake

April 18, 2017 Sarah Ward

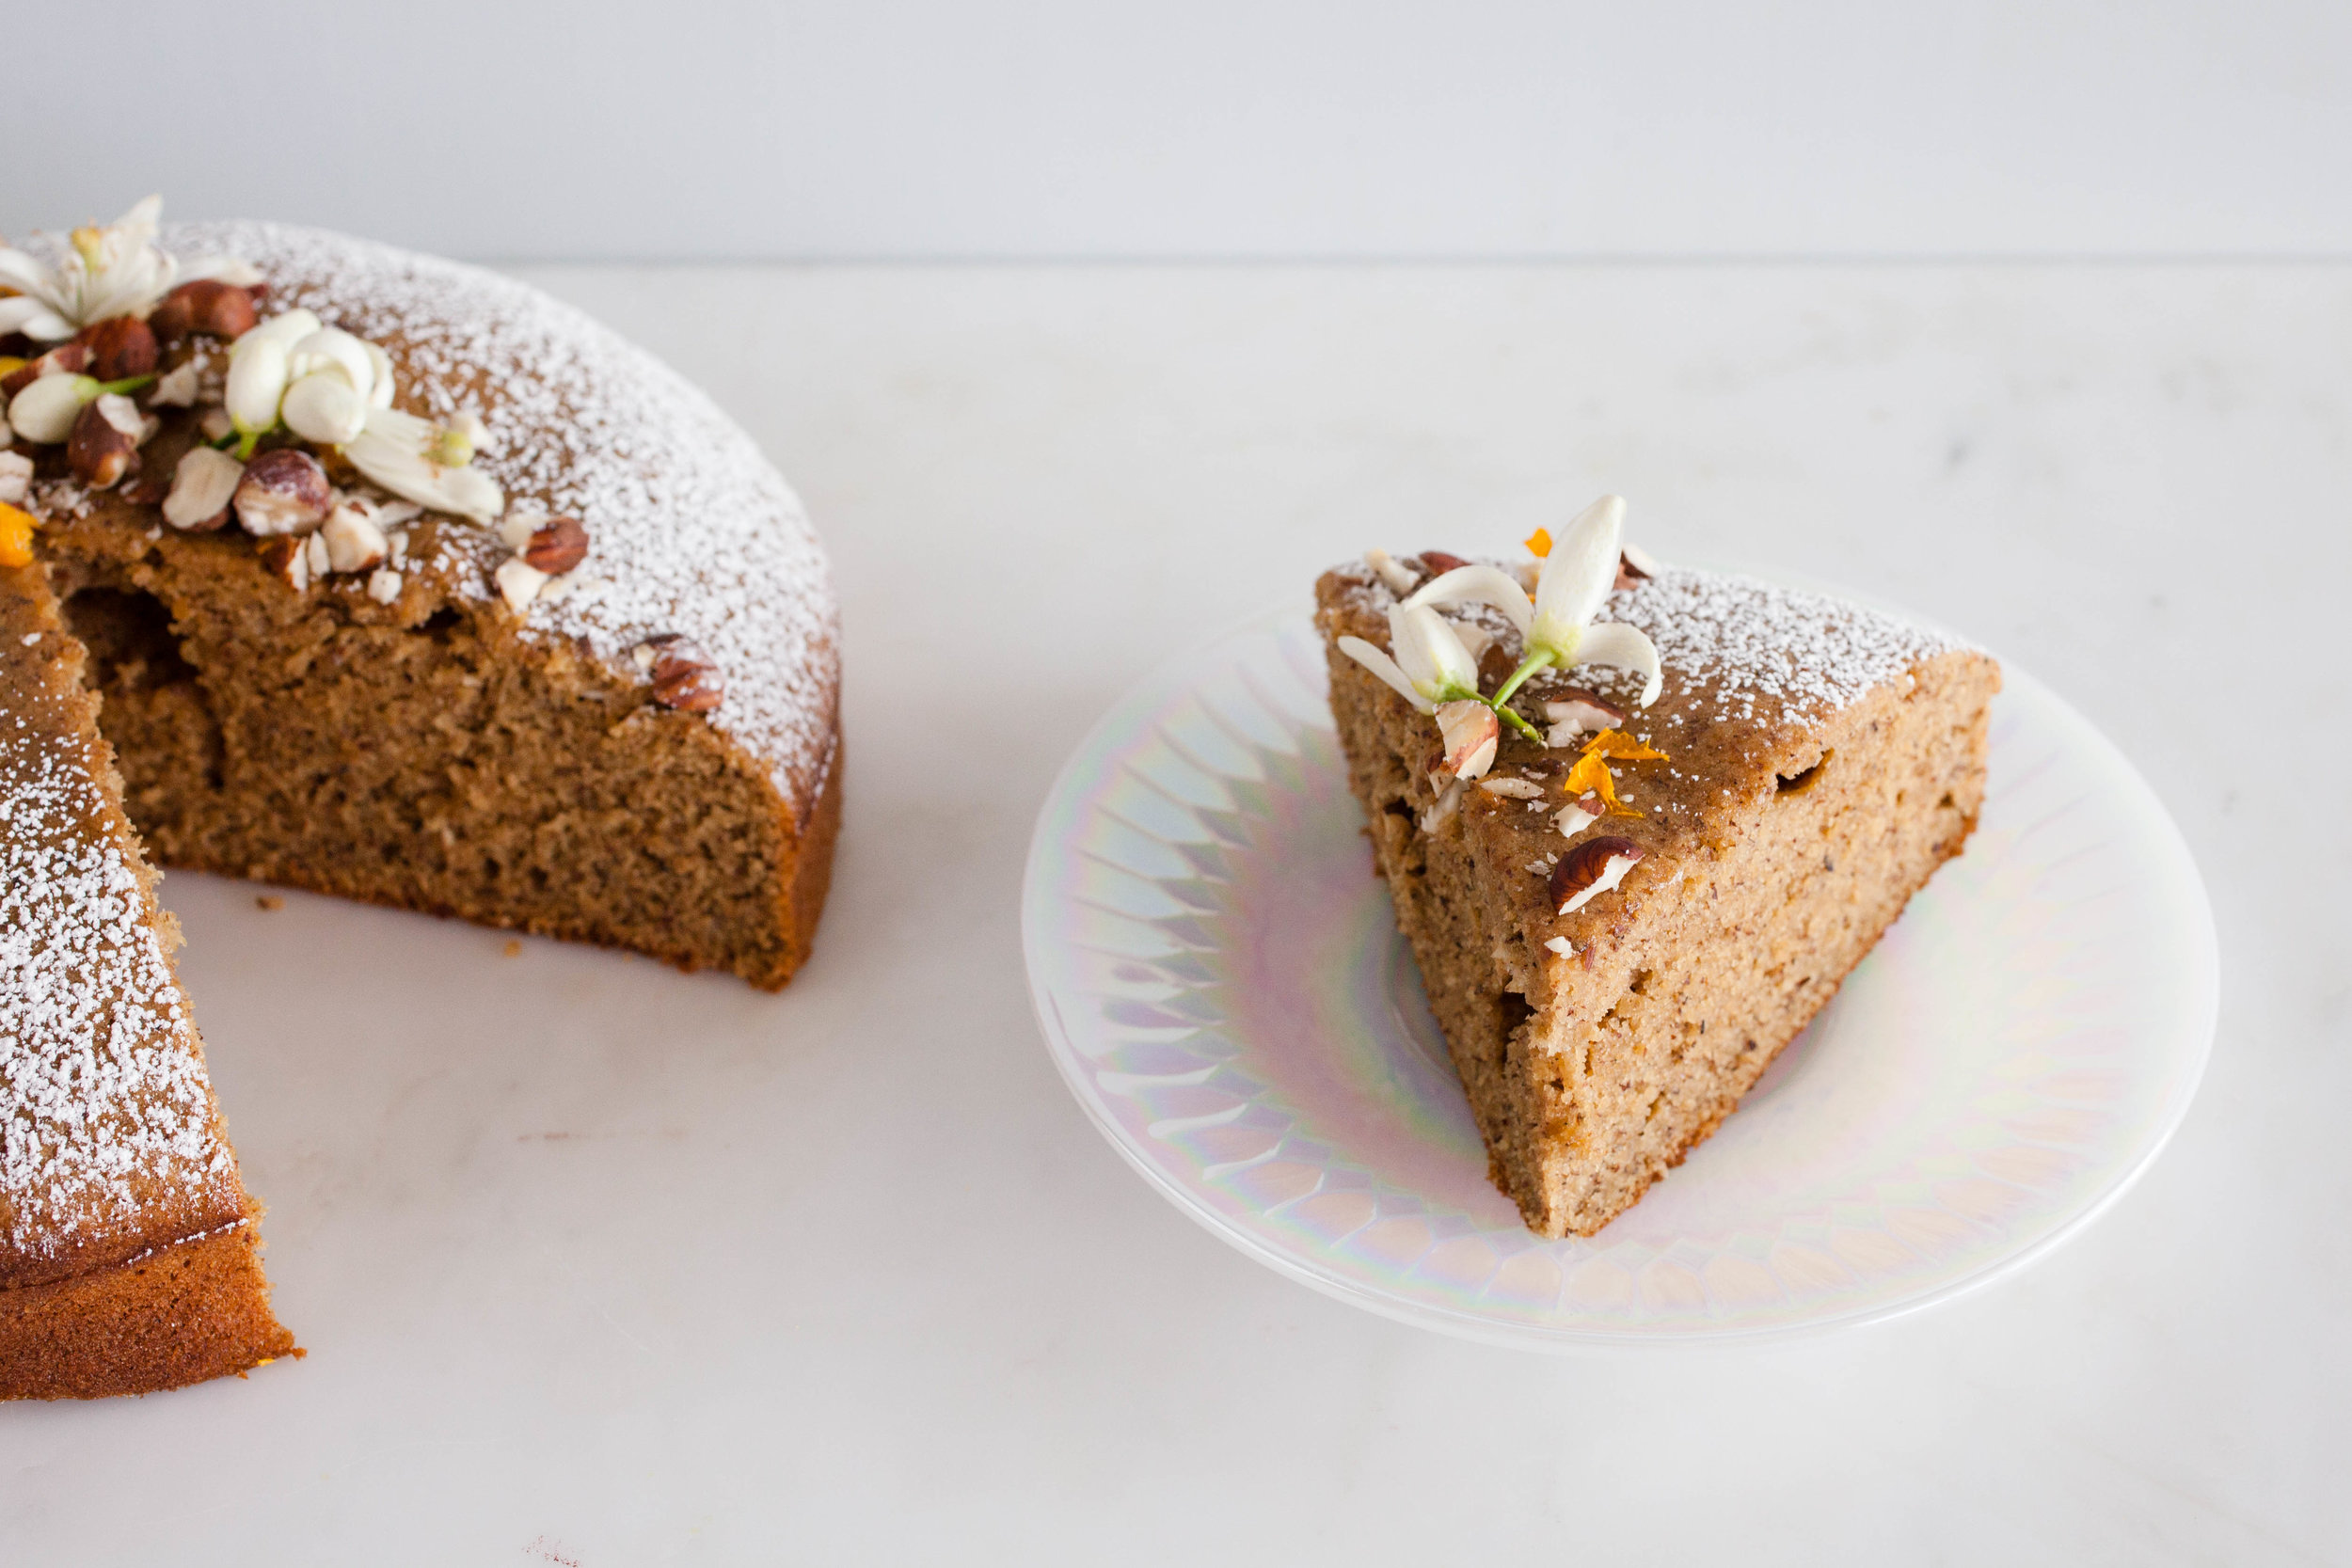
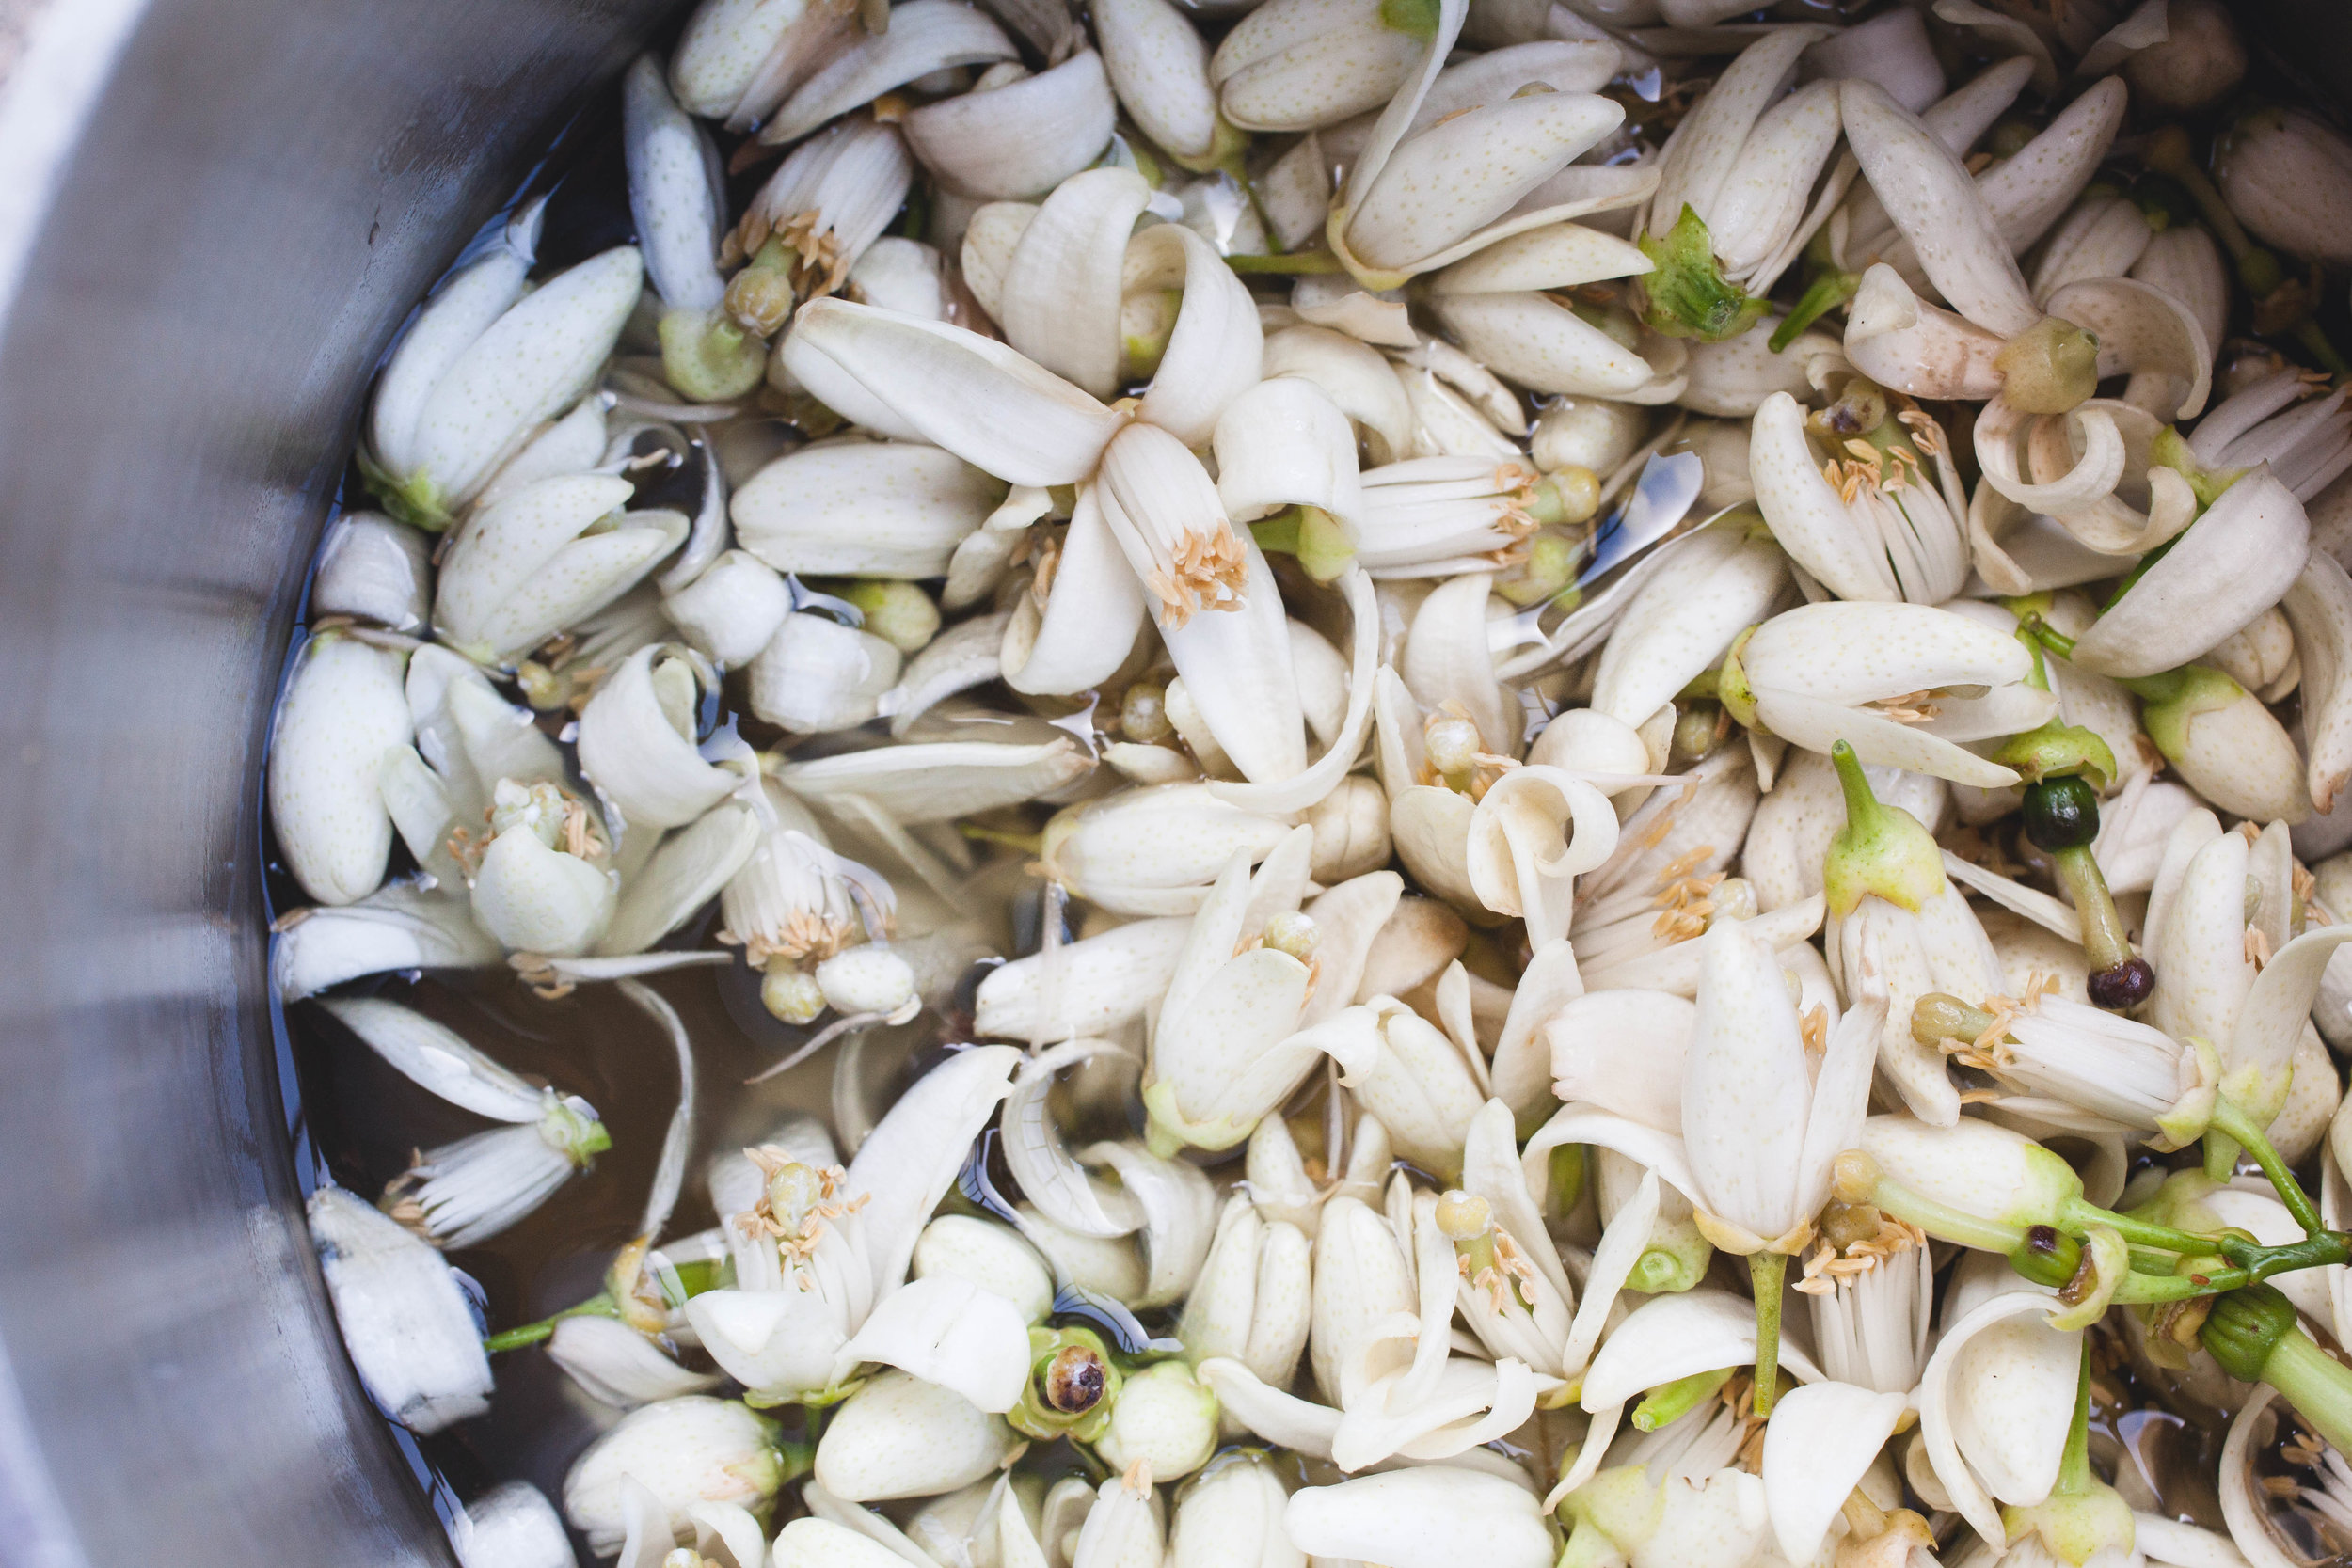
The orange trees in California have been going crazy over the last few months, celebrating the massive amount of rain we received over winter. I'm not sure if you've ever had the pleasure of smelling a blooming orange tree, but it's intoxicating in the best way. There's a house a few blocks over from us that has a single tree in the front yard. On evening walks around the neighborhood, the sweet smell of its blooms fills the air before it's even in sight. This teacake is like that tree. While there are subtle floral notes in the taste, the orange blossom component has everything to do with the smell, and it fills your nose with every bite. Dense but still crumbly, it's slightly sweet and inviting the company of a slathering of jam and cup of Barry's Irish breakfast tea (because it's the best!). 

You'll notice this recipe calls for whole wheat flour, typically taboo in cake recipes as it can add too much density, leaving you without that traditional light and crumbly texture. However, I love using the ivory wheat flour in this cake. Not only does it add nutrients and a bit of protein from the whole grains, this flour adds a delicate toasty layer to the flavor profile. By nature, it does cause the cake to be denser, but that's why you whip the egg whites! This will ensure your cake achieves a nice rise and a good crumb. The addition of hazelnut flour aids in the texture and helps to keep the cake from drying out. Finished off with a brushing of orange blossom syrup, your nose and taste buds will both be thanking you for treating them so well. 

Thanks to Bob's Red Mill for supplying me with these lovely ingredients to play with! If your local grocery store doesn't carry their products you can order the Ivory Wheat flour and Hazelnut flour online!

If you aren't sure where to find orange blossom water, it's started popping up in conventional grocery stores, but any food mart that carries a good selection or specializes in Middle Eastern products should have it. You can also order it online.


Orange Blossom & Hazelnut Tea Cake

  • 1 cup Ivory Wheat Flour (or half traditonal whole wheat, half all-purpose flour)

  • 1 1/2 cup hazelnut flour (can sub with almond)

  • 1/2 tsp baking powder

  • 1/4 tsp salt

  • 2 tsp ground ginger

  • 2 tsp ground cardamom

  • 4 eggs

  • 5 Tbsp softened coconut oil

  • 3/4 cup coconut sugar

  • 2 tsp vanilla extract

  • 1/2 cup milk

  • 2 Tbsp orange blossom water

  • 3 Tbsp orange blossom syrup

Preheat oven to 350’F. Grease an 8” cake pan and line the bottom with a round of parchment paper.

Whisk together all dry ingredients (Ivory flour through cardamom) in a small bowl to remove any clumps. Set aside.

Separate the egg yolks and whites. Set the yolks aside and add the whites to a medium mixing bowl. Beat with an electric mixer on medium speed until soft peaks form. 

In an additional mixing bowl, combine coconut oil and sugar. Beat on low speed until the oil and sugar whips together and becomes *fluffy (about 2 minutes). 

*If you haven’t creamed coconut oil with sugar before, please note that it will start out looking crumbly and then clump together before becoming smooth and eventually the consistency of a thick nut butter. It takes a bit longer than creaming soft butter with sugar (so, stick with it!).

Add in the egg yolks, and beat until the color has lightened a bit and the texture is fluffy (about 1 minute). Mix in the vanilla extract and orange blossom water just until combined. 

Working on the lowest speed, beat a third of the flour mixture into the sugar mixture until the flour is mostly incorporated. Add in half of the milk and beat to combine. Continue this process in the same order with the remaining flour and milk. 

Scoop a cup of the beaten egg whites into the batter. On low speed, mix until fully incorporated. Switching from the electric mixer to a spatula, add the remaining egg whites and gently fold them into the batter by hand, just to combine. If there are a few clumps or thin streaks of whites, that’s ok. 

Pour the batter into the prepared cake pan, spreading it evenly through the pan. Place in the middle of your oven to bake for 30-35 minutes or until the top begins to form small cracks and the center has risen. 

Cool on a baking rack for 10 minutes. Carefully remove the cake from the pan and continue cooling on the rack. Brush the top with orange blossom syrup in 2 or 3 installments, allowing a few minutes between brushings so the cake to soak up the syrup. Remove the parchment paper before serving.

The cake can be eaten as is or with a hearty smothering of jam. For a dressier finish, dust the edges with powdered sugar and decorate with chopped hazelnuts and/or edible flowers. 

Orange Blossom and Hazelnut Teacake_048_sRGB.jpg
In Dessert, Recipe, Spring Tags Cake, Orange, Edible Flowers
Comment

Orange Blossom Syrup

April 16, 2017 Sarah Ward

Orange trees bloom like crazy in the late winter and early spring in California. If you live in an area where citrus grows, or have citrus growers that come to your local farmers market, chances are good that they'll be able to get some orange blossoms for you. Citrus growers tend to thin their trees of flowers and/or fruit in order to regulate their growing cycle, allowing the tree to use less energy and produce better fruit more often. If you're looking for orange blossoms, ask your local citrus growers when their trees bloom and if they'd be willing to sell you some blossoms. Most likely, they'll say yes. 

Since citrus only grows in very specific locations, you can make this syrup using orange blossom water and it'll be just as good! If you aren't sure where to find orange blossom water, it has started popping up in conventional grocery stores, but any food mart than carries a good selection or specializes in middle eastern products should have it. You can also order it online.


Orange Blossom Syrup

  • 1 cup water
  • 3/4 cup sugar
  • 2 cups orange blossoms, rinsed, or 2 Tbsp orange blossom water

Flower method: In a small saucepan, heat the water and sugar on low until the sugar dissolve. Add the orange blossom and bring to a gentle simmer. Immediately remove from the heat, cover, and let the flowers steep for 12-24 hours. Drain the syrup through a fine mesh sieve or cheesecloth and discard the flowers. 

The orange blossom syrup will keep in an airtight container in the fridge for up to a month. You can freeze it or preserve it by water bath canning for use later on. 

Orange blossom water method: In a small saucepan, heat the water and sugar on low. Bring to a gentle simmer, stirring occasionally to ensure the sugar dissolves and doesn't stick to the pan. Stir in the orange blossom water and remove from the heat. Cover and let the syrup cool to room temperature.

The orange blossom syrup will keep in an airtight container in the fridge for up to a month. You can freeze it or preserve it by water bath canning for use later on. 

In Basics & Pantry Staples, Spring, Recipe Tags Orange, Edible Flowers, Syrup
Comment

Kohlrabi and Root Vegetable Hash

March 30, 2017 Sarah Ward

If you read the title and had a confused look at the word "kohlrabi" then you aren't close to being alone in that reaction. However, I would venture to say the chances that you've crossed paths with kohlrabi before are probably high if you frequent winter farmers markets or entered Whole Foods recently.  Kohlrabi is kind of like the cute black sheep of the cabbage family - doesn't look much like a cabbage at all but is rather beautiful and unique to its self in appearance and texture (see image below). Kohlrabi is mostly grown for its bulbous bottom but all parts of the plant are edible. When the crunchy bulb is consumed raw, its relation to cabbage becomes evident with the family's signature sweet and peppery taste. Kohlrabi is also an incredibly nutritious cool-weather crop, packed with fiber and Vitamin C. 

Curious about trying the delicious black sheep cabbage cousin? This breakfast hash recipe is the perfect introduction! Peppery bits of kohlrabi are well balanced with the sweetness of parsnips and sweet potatoes. And if cooked in a cast iron skillet, you'll get to enjoy lots of crispy bits as the vegetables cook in bacon drippings. If there were any doubts about love at first reading, the addition of lots of fresh rosemary and perfectly soft-baked eggs should fix that issue.

You can find the full recipe on Bonnie Plants' website and by clicking the button or image below. Happy breakfast feasting! 

get the recipe!
In Bonnie Plants Recipes, Breakfast, Winter, Spring, One Dish Meals, Recipe Tags Breakfast Hash, Root Vegetables, Kohlrabi, Sweet Potato, Parsnip, Eggs
Comment

Preserving Citrus Waste: Flavored Sugar and Salt

March 12, 2017 Sarah Ward

One of winter's greatest gifts is bright citrus - a welcome contrast to the darker, colder days that come with the season. The smell of an orange and tangy sweetness of grapefruit brighten the dreariest of days and brings anticipation of warmer days ahead. The downside to all of this deliciousness, though, is the amount of waste that comes from consuming citrus. Limes, lemons, oranges and grapefruits of all kinds leave behind their rinds, typically about 15% of the fruit's volume, full of flavor but too bitter to be eaten alone. This winter, I've made a point of trying to save my peels and rinds left over from juicing or eating them out of hand. I ended up with several pounds over a couple of weeks, all of which would have been wasted.

An easy dehydration in a low oven preserves these otherwise wasted rinds, allowing them to keep for months in your pantry. Dried citrus peels aren't a common pantry staple, but they are wonderful to have on hand for adding to tea, soup broths, infusing simple syrups and liquors or boiling in water on the stove, filling your house with their bright sent. My favorite use of all is grinding them to flavor salts and sugars for using in baked goods, sprinkling over eggs and toast or rimming a cocktail glass for some added flair. 


SAVING YOUR RINDS

I keep a large ziplock bag in the refrigerator to throw the rinds into after juicing a lime or peeling an orange. I also keep a smaller one for extra citrus wedges or slices. After a week or so of collection, I dehydrate the contents and store in my pantry. Please do note that if you are using store-bought citrus, it may have been coated with wax. I would suggest using a vegetable wash prior to cutting into or peeling your citrus to remove that wax. If you are using organic or un-coated citrus, just give it a good rinse with water. 

Dehydrating Rinds & Slices

If you have a dehydrator, I'm jealous and your perfectly set-up for preserving your rinds, but you certainly don't need one. An oven works really well. If stored properly in air tight containers, your dried citrus will keep for months in your pantry. If you are using citrus slices or wedges, be sure they are all close to the same thickness. I usually cute mine down to 1/8" or 1/4" thick. 

To dehydrate with an oven: Line a baking sheet with parchment paper. Spread out citrus peels and/or slices into a single layer. Place in a 170F oven (or 150 if your oven will go that low) for 5-8 hours. The peels and slices are dehydrated enough with they snap like a wafer or can be crushed in your fist.  

Flavored Sugar_063_sRGB.jpg

FLAVORed Sugar and Salt

Citrus + SPice Salt

  • 1/2 cup salt (kosher, Himalayan, sea salt, etc)
  • 1/4 cup dried citrus peels
  • 1 tsp spices or herbs (optional)

Line a baking sheet with wax or parchment paper. Pour the salt into the middle of the paper. Place the empty sieve on top of the salt and set aside. 

In a spice grinder or clean coffee grinder (with blades, not burs), add the citrus peels and grind until fine and powdery (some larger pieces may remain). Shake out the ground citrus into the sieve. Finely grind any spices or herbs, if needed, and add to the citrus.

Gently begin shaking the sieve over the salt until all small contents have worked their way through the mesh and only the larger pieces are left behind.  You can regrind the larger pieces and sieve again or save them for adding to a baked goods or tea. 

Carefully lift the paper and pour the salt into an airtight container (I use 8oz mason jars), seal tightly and shake to evenly distribute citrus and spices. Store in your pantry for several month. 

Pictured Below: Meyer Lemon Kosher Salt

Citrus + SPice Sugar

  • 1 cup sugar (granulated or fine castor)
  • 1/2 cup dried citrus peels
  • 2 tsp spices or herbs (optional)

Line a baking sheet with wax or parchment paper. Place a fine mesh sieve on the lined sheet and add the sugar. Set aside.

In a spice grinder or clean coffee grinder (with blades, not burs), add the citrus peels and grind until fine and powdery (some larger pieces may remain). Shake out the ground citrus on top of the sugar in the sieve. Finely grind any spices or herbs, if needed, and add to the citrus and sugar.

Gently begin shaking the sieve over the paper until all small contents have worked their way through the mesh and only the larger pieces are left behind.  You can regrind the larger pieces and sieve again or save them for adding to a baked goods or tea. 

Carefully lift the paper and pour the sugar into an airtight container (I use pint sized mason jars), seal tightly and shake to evenly distribute citrus and spices. Store in your pantry for several month. 

Pictured Below: Blood Orange and Cardamom Sugar, below.

Blood Orange and Cardamom Sugar
Meyer Lemon Kosher Salt

Flavor Combination Suggestions

SALT

  • Meyer Lemon
  • Lime & Chipotle
  • Curry Powder & Ginger
  • Orange & Chili Flakes
  • Lime & Berbere
  • Black Pepper & Lemon

Sugar

  • Blood Orange & Cardamom
  • Navel Orange
  • Ginger
  • Grapefruit & Fennel
  • Lime & Ginger
  • Meyer Lemon and Lavender
In Preserved Foods, Recipe, Winter, Basics & Pantry Staples Tags Citrus, Salt, Sugar, No Waste
Comment

Roasted Brussels Sprout Leaves

February 8, 2017 Sarah Ward
Featured: Brussels Sprout Leaves
Brussels sprouts are a cruciferous vegetable, meaning they are in the Brassicaceae family which includes cabbage, broccoli, collard greens and kale and are packed with nutrition. Brussels sprouts are considered a great disease-fighting food, helping to fight against cancer, diabetes, and heart disease. 

Nutrition: Low in calories and rich in anti-oxidants, potassium, and high amounts of Vitamin K & C. They are also good sources for your daily requirements of dietary fiber, Vitamin A, manganese, potassium, folate, iron and Vitamin B6. So, basically, they're like Nature's tasty multi-vitamin. 

Season: Harvest season is between September and March in temperate climates. Sprouts and leaves become sweeter after a frost.

Brussels sprouts in all forms are covering restaurant menus and Pinterest pages these days, but often overlooked are the large leaves that shelter the tiny sprouts as they grow (if you're unfamiliar with how Brussels sprouts grow, check this out). The leaves are edible and just as tasty as the sprouts. They aren't typically found in conventional grocery stores, but they are popping up around farmers markets or you may have them in your own garden. The leaves can be used in the same ways as kale, cabbage or collard greens by sautéing, shredding into salads or adding to green smoothies. But what you may be even less familiar with or just walked by dismissing it as cabbage, is the top of the Brussels sprouts stalk. As the stalk grows, the leaves form a head at the top, much like a very loose head of cabbage or one giant Brussels sprout. I love the small sprouts, but I definitely think the head of leaves is where the magic is. 

To me, the best roasted sprouts are when the outer leaves get crispy but the inner core is tender and sweet. The head of Brussels sprout leaves create that partnership perfectly.  If you are growing your own Brussels sprouts or find the heads locally, try this method of roasting and treating it like one giant Brussels sprout. The recipe below is just a baseline for roasting; how you choose the finish the roasted leaves us totally up to you! I used a bunch of fresh herbs I had leftover in the fridge to make a pesto, drizzled with extra vinegar, some shaved parmesan and additional fresh herbs. This is a great way to use up leftover condiments, herbs, sauces and cheeses that you have sitting around. If you can't find the heads of leaves, a napa, savoy or red cabbage will substitute nicely. 


Roasted Brussels Sprout Leaves

  • 1 head of Brussels sprout leaves or cabbage
  • 1/2 cup balsamic vinegar
  • 2 tsp brown sugar, honey or maple syrup
  • 1/2 tsp kosher salt
  • 2 Tbsp olive oil
  • Various toppings of choice (pesto, chili oil, Sriracha, fresh herbs, cheese, etc.)

Preheat your oven to 375 F. 

Cut your head of Brussels sprout leaves or cabbage in half, from the top of the head to the stem end. Place each half cut side up on a lined baking sheet. 

In a small bowl, mix together vinegar, sugar, salt and olive oil. Pour a quarter or so of the mixture over the cut side of each half, allowing the liquid to seep in between the layers of leaves. Flip them over, cut-side down and lift any outer loose leaves, brushing the inner leaves with the mixture and all over the outside of each half. If you have any remaining vinegar, set aside for later use. 

Place the sheet pan in the oven and roast for 20-30 minutes, or until the middle is tender and the outer leaves become brown and crispy. You do not want them to burn.

Remove from the oven and serve with garnishes of your choice.  I drizzled mine with the remaining vinegar, herb pesto, fresh mint and dill leaves, and shaved parmesan cheese. 

In Recipe, Salads + Sides, Winter, Vegetarian, Vegan, Fall Tags Brussels Sprouts, roasted vegetables, vegan, vegetarian
Comment
← Newer Posts Older Posts →
 

of the dirt blog

I believe there is a necessity for us to be connected to our food. It makes us aware of seasons and life cycles. It reminds us that vital functions on earth are unplugged. It gives us a unique way to express creativity and build community. I hope the recipes and thoughts shared here Inspire you to make something delicious for someone you love (or just yourself!).


BLOG AUTHOR

Sarah Ward is the Editor of Taste of the South magazine. Currently enjoying life in Birmingham, AL with her husband and their polydactyl cat, Jack.

Sarah Ward is the Editor of Taste of the South magazine. Currently enjoying life in Birmingham, AL with her husband and their polydactyl cat, Jack.


search for recipes


Follow @ofthedirt on instagram

This weekend, a group of friends and talented bakers held another bake sale. With a short 7 days of planning and 4 days of advertising, this small group of kickass women raised over $1,000 selling hand pies, cookies, and pastries. To everyone who sup
🎉GIVEAWAY!!! Want to win a free box of homemade pastries?! There are a few ways to win: 

Birmingham Locals: 
1. Tag your local friends below and spread the word about our bake sale fundraiser. Each tag is an entry. TWO winners will be chosen tomorr
HAPPY FALL!!!!!!! It’s my favorite time of year and for the first time that I can remember, it actually feels like fall outside in Alabama! To celebrate, make a batch of these Pumpkin Oatmeal Chocolate Chunk Cookies...they use a whole jar of @t
It was 68 degrees here today and everyone was hoarding the fall products at Trader Joe’s yesterday (I actually witnessed a woman frantically grab 6 hand soaps, 5 candles, and 3 of every pumpkin-filled-treat thing they had). BUT I’ve got o
Quick pickles are one of the best flavor tools to keep on hand. They brighten up any dish - eggs, tacos, toast, salads, chili, sandwiches, pretty much anything that goes with vinegar. And, they’re so easy to make! (You don’t really even n

Let's Keep in Touch!

Get new recipes delivered right to your email. 

Thank you! Looking forward to staying in touch.

For now, head on over and say hi here. 

© Sarah Ward and of the dirt, 2017. Unauthorized use and/or duplication of the photographs and recipes without express and written permission from this blog’s author and/or owner is strictly prohibited. Excerpts and links may be used, provided that full and clear credit is given to Sarah Ward and of the dirt with appropriate and specific direction to the original content.