• Home
  • Blog
  • Basics + Pantry Staples
  • Preservation
  • Desserts & Sweets
  • Breakfast
  • Entrees & One-dish Meals
  • Salads + Sides
  • Soups & Stews
  • 10 Minute Recipes
  • About
  • Say Hello
  • Portfolio
Menu

of the dirt

Street Address
San Diego, CA
Phone Number
an exploration of food and culture

Your Custom Text Here

of the dirt

  • Home
  • Blog
  • Recipes
    • Basics + Pantry Staples
    • Preservation
    • Desserts & Sweets
    • Breakfast
    • Entrees & One-dish Meals
    • Salads + Sides
    • Soups & Stews
    • 10 Minute Recipes
  • About
  • Say Hello
  • Portfolio

Golden Milk Pound Cake

September 19, 2018 Sarah Ward
Golden Milk Pound Cake_010_sRGB.jpg

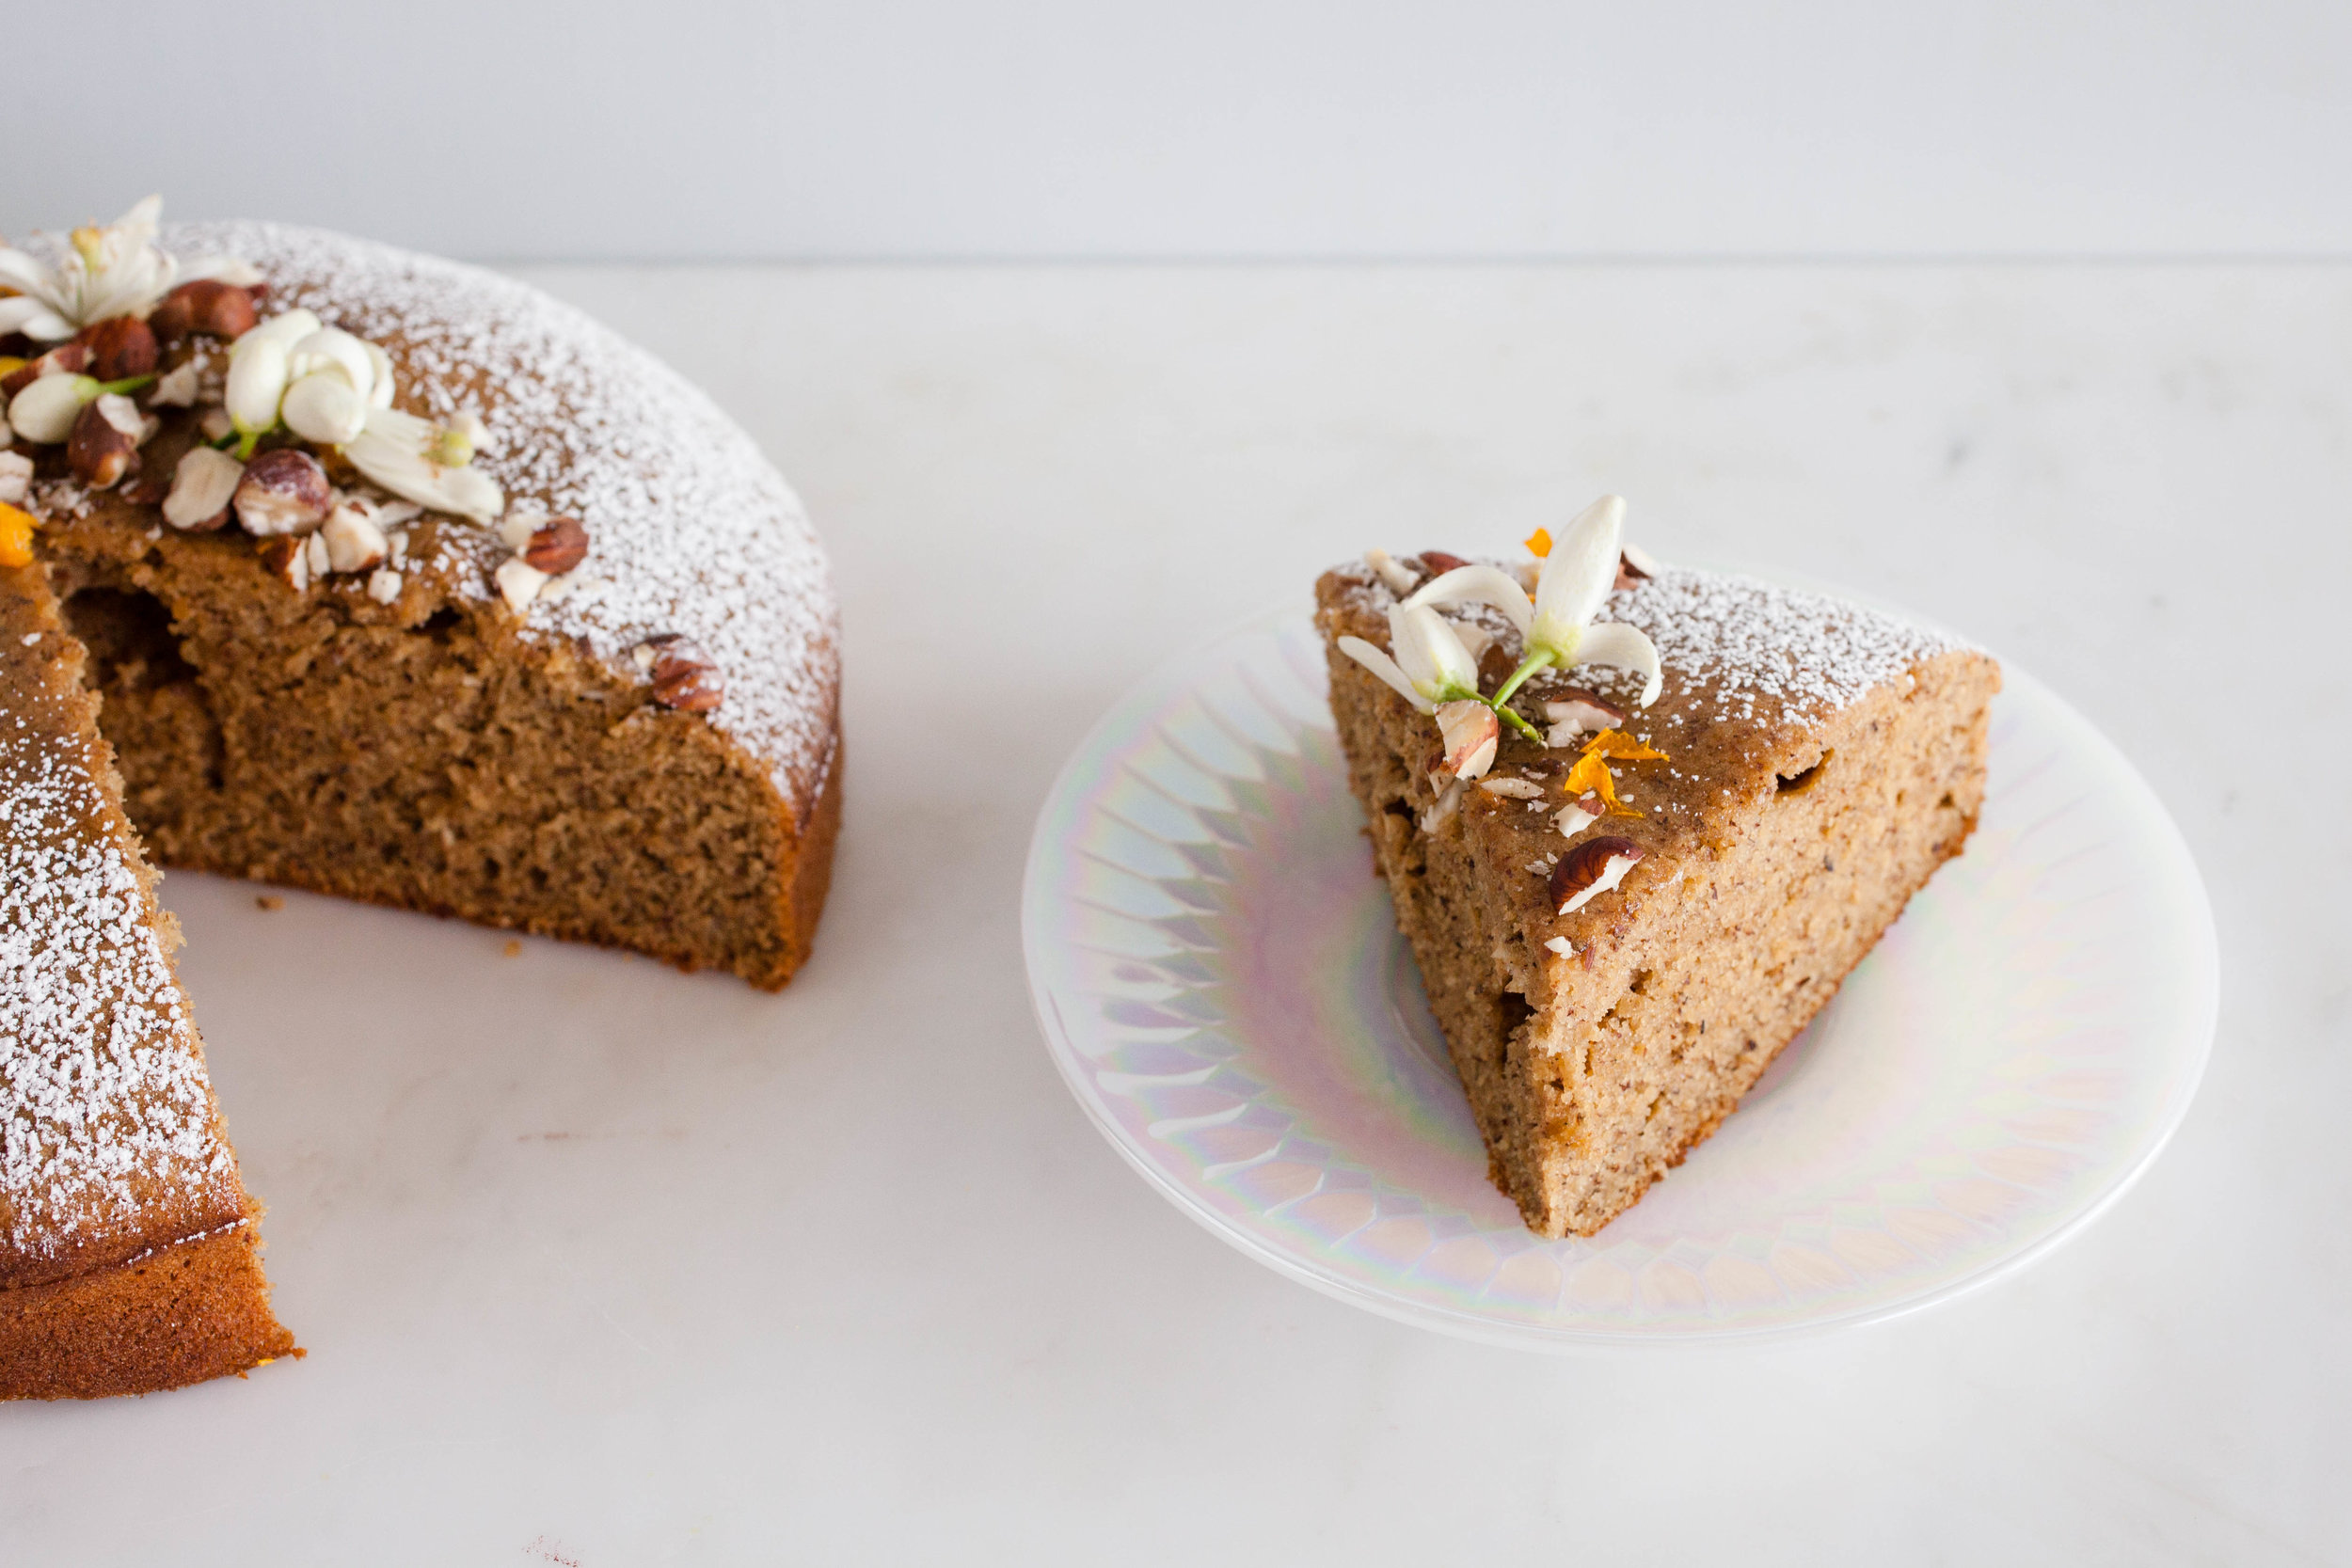
There’s a not-so-secret rule in our family that you don’t mention the word “turmeric” around my dad unless you want to start a somewhat lengthy, although educational, conversation about the many benefits of the super-powered root. For this reason, I found it only fitting to bake a turmeric-ladened cake in a pan he gave me for my birthday as its inaugural bake.

This not-too-sweet pound cake contains a increasingly popular turmeric-based beverage mix called Golden Milk. Typically whisked into steamed animal or alternative milks, it has a number of valuable health properties as well as delicious flavor and beautiful color. I decided to use it here for flavor more than its health benefits (this is cake after-all…). The turmeric shines brighter in color than taste, however its low-profile earthy notes mixed with vanilla give your taste buds a magical reminder of coconut. The additional mix of cinnamon, cardamom, ginger, and black pepper give warmth to the overall flavor, rounding out the sweetness.

Included is a recipe for homemade Golden Milk Powder and a quick how-to for making yourself a beverage if you feel so inclined! You can also substitute your favorite store-bought powder in the cake recipe if you’d prefer.


GOLDEN MILK POUND CAKE

  • 2 1/2 cups all-purpose flour

  • 1/2 teaspoon kosher salt

  • 1/4 teaspoon baking soda

  • 2 tablespoons Golden Milk Powder (recipe below)

  • 3/4 cup unsalted butter, softened

  • 2 cups granulated sugar

  • 5 large eggs at room temperature

  • 1 teaspoon vanilla extract

  • 1 cup full-fat yogurt or sour cream

  • 1 1/4 cups powdered sugar

  • 2 tablespoons milk or cream

  • Ground cinnamon

Preheat oven to 325º. Spray a 15-cup Bundt pan with baking spray. (I personally love to use the Sprouts Grapeseed Oil spray.)

Whisk together flour, salt, baking soda, and Golden Milk Powder.

Beat butter on medium speed until smooth. Add sugar and continue beating until fluffy, about 3 minutes. Add eggs, one at a time, fully incorporating each before adding the next. Beat in vanilla.

Turn mixer speed to low. Add one third flour mixture, mixing just until incorporated. Add half of yogurt until just incorporated. Repeat with remaining flour and yogurt, ending with flour. (Be sure to scrape the sides of the bowl as needed.) Transfer the batter to your greased pan.

Bake on the middle oven rack for 1 hour and 15 minutes or until a wooden pick inserted in the center of the cake comes out clean. (The top will crack and the crack should look mostly dry.) Cool on a wire rack for 15 minutes. Carefully flip the cake pan upside down on the rack to remove cake. Let cool completely.

Whisk together powdered sugar and milk. (Add more milk for a thinner glaze.) Drizzle cooled cake with glaze before serving and sprinkle with cinnamon for a bit of extra spice.


IMG_6427.jpg

Golden Milk Powder

Makes about 1/3 cup

  • 2 tablespoons turmeric powder

  • 2 tablespoons ground Vietnamese cinnamon

  • 1 1/2 tablespoons ground ginger

  • 1 tablespoon ground cardamom

  • 1 teaspoon ground black pepper

Mix all spices together and store in an airtight jar in the pantry.

To make a golden milk latte: Heat 8-ounces desired milk until steaming. Whisk in 1 teaspoon Golden Milk Powder (or more to taste) until spices are fully incorporated. Sweeten to taste. Enjoy immediately.


Golden Milk Pound Cake_015_sRGB.jpg
In Dessert, Fall, Recipe Tags Cake, Pound Cake, Golden Milk
Comment

Strawberry Milk Panna Cotta

June 27, 2017 Sarah Ward
Strawberry Milk Panna Cotta_133_sRGB.jpg
Featured: Strawberries
When ripe, strawberries should have a strong sweet aroma, rich coloring, and a sweetness that virtually melts in your mouth. I like to look for smaller berries, as they tend to be sweeter than the large ones. A hint for looking for a well ripened strawberry - look to see if the flesh is red all the way to stem's base. Many times when you purchase strawberries in the supermarkets out of season, they will be mostly white at the top. This is a sign that the berry likely doesn't have much flavor and will be white through most of the inside.

Nutrition: Rich in Vitamin C, dietary fiber and manganese. Also a good source of potassium and folate. 

Season: Depending on climate/region, harvest can begin as early as March and go into November. 

My love of panna cotta started at a friend's restaurant in Austin with a delicious concoction of vanilla panna cotta, sliced red grapes, and basil caviar. It's probably the happiest I've ever felt after eating dessert, which pretty much means I was fully elated because eating dessert already equals happiness. My love for strawberry milk goes back to childhood sleepovers at my grandmother's house with my cousin Emily. My grandmother was a pretty healthy eater - fresh fruit, whole wheat toast, bran cereal, vegetables from her backyard garden - but she enjoyed spoiling her grandchildren with Nesquik's strawberry milk. I don't think I'll ever forget the distinct yellow tin it came in and the way the pink powder floated through the air as we scooped it into our glasses of milk. When I set out to make this panna cotta, I wanted to feel both of those happy memories in the finished product, but with a more...natural flavor.

Panna cotta seems to have a reputation of being difficult to make which is why I had never attempted it before. The reality is, you can make it into a fussy dessert, but it doesn't have to be. This recipe makes it simple and doesn't require any fancy molds (therefore, no fear of unmolding and turning elation into depression). It's the perfect cool dessert for a warm day that won't quickly melt on you or require special equipment. And the best part is you can easily make it a few days in advance! Just be sure to cover the ramekins with plastic wrap or the like once the panna cotta has set (can be stored for up to a week).

You should heed one warning - do NOT use Horizon brand organic milk or cream. For some reason, it causes the panna cotta to turn gritty (which is definitely depressing). I found the best results from Organic Valley. Yes, it's more expensive. Yes, it tastes better. So, yes, it's worth the few extra bucks. And overall, this dessert is pretty economical. Also, finding the sweetest strawberries is always best, but if you need save a couple of dollars to buy the good milk, go for it. 


Strawberry Milk Panna Cotta

  • 1 lb strawberries (fresh or frozen)
  • 1/2 - 3/4 cup granulated sugar
  • Generous pinch of salt
  • 1 1/2 cups whole milk
  • 1/4 cold water
  • 3 tsp gelatin (about 1 1/2 packets)
  • 1 cup heavy cream
  • 1/4 tsp vanilla extract
  • 1/4 tsp almond extract
  • 2 cups sliced strawberries
  • A tablespoon sugar

In a medium sauce pan, combine strawberries, sugar, and salt. Bring to a simmer over medium-low heat. Let the strawberries bubble for 20-30 minutes, stirring frequently, allowing the juices the thicken and the flavor to concentrate. When the fruit is very soft, turn off the heat. Use a stick blender, or carefully transfer to a regular blender, to fully puree the berries. Return the pureed mixture to low heat and stir in the whole milk. 

As the milk is heating, add the water to a small bowl and sprinkle the gelatin evenly over the surface. Set aside to hydrate. When the milk mixture is hot to the touch or 120' F, whisk in the hydrated gelatin until fully dissolved. Remove from the heat. 

Set a fine mesh sieve over a mixing bowl and strain the strawberry milk through it. This will remove most seeds and any potential clumps of gelatin. Stir in the heavy cream, vanilla and almond. Pour 1/4 to 1/3 cup of the mixture into glass ramekins or small glasses. Place in the fridge to chill for at least 6 hours or overnight. 

Just before you are ready to serve, toss strawberry slices with sugar and let the berries macerate for 10 minutes or longer. Spoon over the top of each panna cotta and serve.

Yield: 6-8 servings
In Dessert, Recipe, Summer, Spring Tags Strawberries, Dessert, panna cotta
Comment

Orange Blossom & Hazelnut Teacake

April 18, 2017 Sarah Ward

The orange trees in California have been going crazy over the last few months, celebrating the massive amount of rain we received over winter. I'm not sure if you've ever had the pleasure of smelling a blooming orange tree, but it's intoxicating in the best way. There's a house a few blocks over from us that has a single tree in the front yard. On evening walks around the neighborhood, the sweet smell of its blooms fills the air before it's even in sight. This teacake is like that tree. While there are subtle floral notes in the taste, the orange blossom component has everything to do with the smell, and it fills your nose with every bite. Dense but still crumbly, it's slightly sweet and inviting the company of a slathering of jam and cup of Barry's Irish breakfast tea (because it's the best!). 

You'll notice this recipe calls for whole wheat flour, typically taboo in cake recipes as it can add too much density, leaving you without that traditional light and crumbly texture. However, I love using the ivory wheat flour in this cake. Not only does it add nutrients and a bit of protein from the whole grains, this flour adds a delicate toasty layer to the flavor profile. By nature, it does cause the cake to be denser, but that's why you whip the egg whites! This will ensure your cake achieves a nice rise and a good crumb. The addition of hazelnut flour aids in the texture and helps to keep the cake from drying out. Finished off with a brushing of orange blossom syrup, your nose and taste buds will both be thanking you for treating them so well. 

Thanks to Bob's Red Mill for supplying me with these lovely ingredients to play with! If your local grocery store doesn't carry their products you can order the Ivory Wheat flour and Hazelnut flour online!

If you aren't sure where to find orange blossom water, it's started popping up in conventional grocery stores, but any food mart that carries a good selection or specializes in Middle Eastern products should have it. You can also order it online.


Orange Blossom & Hazelnut Tea Cake

  • 1 cup Ivory Wheat Flour (or half traditonal whole wheat, half all-purpose flour)

  • 1 1/2 cup hazelnut flour (can sub with almond)

  • 1/2 tsp baking powder

  • 1/4 tsp salt

  • 2 tsp ground ginger

  • 2 tsp ground cardamom

  • 4 eggs

  • 5 Tbsp softened coconut oil

  • 3/4 cup coconut sugar

  • 2 tsp vanilla extract

  • 1/2 cup milk

  • 2 Tbsp orange blossom water

  • 3 Tbsp orange blossom syrup

Preheat oven to 350’F. Grease an 8” cake pan and line the bottom with a round of parchment paper.

Whisk together all dry ingredients (Ivory flour through cardamom) in a small bowl to remove any clumps. Set aside.

Separate the egg yolks and whites. Set the yolks aside and add the whites to a medium mixing bowl. Beat with an electric mixer on medium speed until soft peaks form. 

In an additional mixing bowl, combine coconut oil and sugar. Beat on low speed until the oil and sugar whips together and becomes *fluffy (about 2 minutes). 

*If you haven’t creamed coconut oil with sugar before, please note that it will start out looking crumbly and then clump together before becoming smooth and eventually the consistency of a thick nut butter. It takes a bit longer than creaming soft butter with sugar (so, stick with it!).

Add in the egg yolks, and beat until the color has lightened a bit and the texture is fluffy (about 1 minute). Mix in the vanilla extract and orange blossom water just until combined. 

Working on the lowest speed, beat a third of the flour mixture into the sugar mixture until the flour is mostly incorporated. Add in half of the milk and beat to combine. Continue this process in the same order with the remaining flour and milk. 

Scoop a cup of the beaten egg whites into the batter. On low speed, mix until fully incorporated. Switching from the electric mixer to a spatula, add the remaining egg whites and gently fold them into the batter by hand, just to combine. If there are a few clumps or thin streaks of whites, that’s ok. 

Pour the batter into the prepared cake pan, spreading it evenly through the pan. Place in the middle of your oven to bake for 30-35 minutes or until the top begins to form small cracks and the center has risen. 

Cool on a baking rack for 10 minutes. Carefully remove the cake from the pan and continue cooling on the rack. Brush the top with orange blossom syrup in 2 or 3 installments, allowing a few minutes between brushings so the cake to soak up the syrup. Remove the parchment paper before serving.

The cake can be eaten as is or with a hearty smothering of jam. For a dressier finish, dust the edges with powdered sugar and decorate with chopped hazelnuts and/or edible flowers. 

Orange Blossom and Hazelnut Teacake_048_sRGB.jpg
In Dessert, Recipe, Spring Tags Cake, Orange, Edible Flowers
Comment

Persimmon and Apple Crumb Pie

December 22, 2016 Sarah Ward

One of the most anticipated fruit seasons of the year for me is when persimmons hit the market. I find myself with a bowl full of them on the counter at most times during the months of fall and winter. These orange squatty fruits are like little the peaches of winter - nothing quite like them and when they are ripe and sweet they are perfect eaten out of hand. I will issue you a fair warning though; please be sure you know which variety your are digging into and just what "ripe" means for it, or you might surprise yourself with a less-than-thrilling feeling of eating chalk....

I know I talked a bit about persimmons last year, but I keep meeting people that don't know what they are or don't like them because they've had a bad experience eating an astringent one. So, I'll be posting a few persimmon based recipes as we lead into winter. For those of you who don't fawn over pumpkin everything, persimmons may just be the "basic" obsession you need.    

Featured: Fuyu Persimmons
When ripe, they have a honey-like sweetness that is delicious and unique for a winter fruit. This particular variety is not astringent (causing a chalky mouth feel) so it can be eaten when less ripe, but their sweetness deepens as they ripen. As the persimmon ripens, the color will become richer and the flesh will start to give slightly - similar to a slightly under ripe pear. Serve raw or cooked.

Nutrition: Rich in potassium and Vitamins A and C. Also a good source of antioxidants, fiber and Omega-6.

Season: October & November; through winter in warmer climates.

For this Persimmon and Apple Crumb Pie, you'll want to find richly colored Fuyu persimmons that are still firm. You can tell if they are the right ripeness by placing one in your palm and gently giving it a squeeze - it should feel like an apple. If this is your first time working with persimmons, keep the stem end on while peeling and slicing. This will give you something to grip and ensure your hand doesn't slip (while I'm sure the ER doctors are lovely, please don't go visit them). You can use a standard vegetable peeler and peel the fruits just like you would an apple. There is no thickening agent added to this pie, something which any pie maker might find odd. Persimmons are very high in pectin and since the fruit macerates and the juiced are then reduced, there's no need for extra cornstarch or flour. 


Persimmon and Apple Crumb Pie

  • 6 Fuyu persimmons (4-5 if they are large - about the size of your palm)

  • 1 large apple, cored

  • 3 Tbsp granulated sugar

  • 3 Tbsp brown sugar (or sub in 6 Tbsp coconut sugar for both granulated and brown cane sugar)

  • 1 tsp ground cinnamon

  • 1 tsp ground ginger

  • 1/4 tsp ground cardamom

  • 1/8 tsp ground black pepper

  • 1 large orange, juiced

  • 1 recipe Basic Pie Crust, prepared and refrigerated

  • Egg wash (optional; 1 egg beaten with 1 Tbsp cold water)

Crumb Topping

  • ½ cup all-purpose flour

  • ½ cup almond flour

  • 3 Tbsp brown sugar

  • 4 Tbsp unsalted butter

  • ½ vanilla bean, split and scraped or 1 tbsp vanilla extract

Peel and slice the persimmons and apples into thin rounds (1/4” thick). If you have a mandolin, keep the stem end on the fruits to use as a hand guard and guide. Deseed any slices if necessary and place in a gallon size zip-top bag or other airtight container. In a small bowl, combine both sugars and all dry spices. Sprinkle over the fruit. Pour in the orange juice and toss to fully coat. Seal the bag, making sure to press out any air, or press a sheet of plastic wrap onto the surface of the fruit and seal with the lid. Place in the refrigerator for at least 6 hours or overnight.

Roll out the pie dough and place it in a 9” pie pan. Crimp or decorate the edges as desired. Place the prepared crust in the freezer until ready to fill.

(This is a great place to pause if you need to prepare something else for your meal or are wanting to prep for your pie ahead of time. When ready to bake, continue with instructions below.)

Preheat oven to 350 F.

Strain the sliced fruit, collecting the syrup in a bowl. Place the syrup in a small sauce pan over medium-low heat and bring to a low simmer, stirring occasionally. Cook until the liquid thickens and becomes the consistency of cold maple syrup. Remove from the heat and set aside.

To make the crumb topping, mix together flours and sugar. Add the butter to a small saucepan over medium-low heat. Stir as the butter melts and bubbles. Continue stirring and cook until the butter solids start to brown, about 3 minutes. Remove from the heat and stir in the vanilla bean scrapings or extract. Pour the browned butter over the flour mixture, mixing with a fork until the ingredients are no longer dry and have formed small clumps.

Remove your pie crust from the freezer and brush the edges of the crust with the egg wash, if desired. Fill the pie by evenly layering in the sliced fruit. Some of the persimmon slices may have stuck together, so gently peel them apart. For any groupings that are falling apart instead of pealing away from each other, don't worry about separating them. Pour the reduced syrup over the fruit and spread the crumb topping evenly over the pie. Place on a parchment lined  sheet pan in the middle of your oven for 35-40 minutes.  The pie is done when the juices begin to bubble up along the edges of the filling.  

Cool on a rack for at least 1 hour before serving. This pie is excellent served with a scoop of vanilla bean ice cream or freshly whipped cream.

Yield: 9" pie - about 8 servings // Store in the refrigerator loosely wrapped in plastic for up to a week.

IMG_3113.JPG


In Dessert, Holiday Recipes, Pie, Winter, Recipe, Fall Tags Persimmon, pie, Holiday Pie, Apple, Apple persimmon pie, apple pie, persimmon pie, fuyu persimmons, fuyu persimmon pie, persimmon desserts
Comment

Heirloom Apple Pie (create your own family recipe)

November 20, 2016 Sarah Ward
Heirloom Apple Pie_031_sRGB.jpg

To many families, holiday traditions just aren't complete until Grandma's (or Aunt Martha's, or Uncle Pete's) pie has been passed around the table. Like an heirloom, these revered recipes often come to us from generations past and connect us to the larger whole of our family. I grew up with two Southern grandmothers (well, one was technically Cuban but adopted by the south), so my family is certainly not short on heirloom recipes. However, a good holiday pie is conspicuously absent, so this season I set out to create one. I came up with a few tips during this process that I'd like to share so that you can start your own holiday tradition.

How to test your pie flavors 

Ok, I know that the hardest part about putting a pie recipe together can be knowing where to start. It can be so frustrating to put in the work peeling all of those apples and rolling out crust only to end up with flavors that just don't dazzle. My suggestion here is to start with some small-scale tests. Cooking apples with a few different spice mixes on the stovetop is quick and an easy way to experiment without having to commit to a whole pie (side note: this technique is also great for a stand alone dessert on those nights when you wanna be easy but still treat yo'self). I've broken this process down to a few simple steps and put them into a guide to help you organize the process.

  • Download the recipe testing chart (via the button below)

  • Choose a variety of apples to test with - both tart and sweet, soft and firm

  • Get creative with your spices and flavors - this is the perfect time to try things that you might be unsure of how they'll taste. There's a sheet included in the download with a guide to apples and complimenting flavors. Google is a great resource here, as well. Simply search for "Spices (or fruits, nuts, flavors...) that compliment _____" and go from there. `

  • Once you've determined what spices and flavors are your favorite, scale the recipe as denoted on the sheet. The basic formula is below:

    • Measurement of spices/other flavorings used in test x # of apples used in a full pie = Total measurement for a full pie

  • Follow the recipe below for making your full heirloom pie!

Note about scaling: Small scale tests may not always translate perfectly to the full-size version. I recommend trying to use the same size apples in your pie that you tested. Or, given that apples naturally vary in size, premix your spices to your full scale and add them into your apples a teaspoon at a time - this is mostly important for your first full-scale pie. If you track your teaspoon measurements, you can make up a big batch of heirloom pie spices and just list your recipe as "3 tsp of family spice mix." This would be a great thing to keep on hand or give a jar along with the pie recipe to your family as a personalized gift (and win best gift giver of the year).

Recipe Testing Chart (click to download)

Share your family's creation with #heirloomapplepie and #ofthedirtrecipes!


heirloom Apple Pie

  • 5-7 apples (a variety of tart and sweet)

  • 1 tablespoon sugar per apple (half brown, half granulated is recommended, or try coconut sugar)

  • Heirloom Test Recipe spice mixture (or 3-4 tsp spices of choice)

  • 1 tablespoon all-purpose flour or tapioca flour per apple

  • 2 Basic Pie Crusts

  • Egg wash (1 egg beaten with 1 Tbsp water; optional)

  • Sugar for finishing (optional)

  1. Peel, core and slice your apples into ⅛ - ¼” thick slices. Cut into bite-sized pieces or leave whole and place in a large mixing bowl. Add in sugar and spices and toss to coat. If you are using your tested heirloom spices for the first time, it is recommended to add the mix in one teaspoon at a time. Taste an apple slice as you go and stop when you feel it is seasoned to your liking. Cover and let stand for 3 hours or chill overnight. (You can skip this step, but letting the apples macerate will help reduce the amount the fruit shrinks when baking.) Stir flour into apples.

  2. Roll out one disk of pie dough and fill your 9” pie pan. Trim or leave the overhang depending on how you’d like to decorate the crust. Fill your crust with apples, gently pressing them down as you go - this will help them settle and keep your pie from developing a gap between the apples and top crust. Dome apples in the center if they rise above the pan’s edge.

  3. Roll out the second pie dough and cover the top of the apples in any design desired. If covering with a full crust and not a lattice or cut shapes, be sure to cut a few slits in the top for ventilation. Trim edges of dough to about 1-inch beyond the edge of the pan. Fold edges over and crimp as desired. Brush with the egg wash and sprinkle with sugar, if desired. Freeze pie while oven preheats.

  4. Preheat oven to 415F

  5. Place the pie on a lined baking sheet. Bake in the center of your oven for 15 minutes. Reduce the heat to 350F and bake for an additional 45 - 50 minutes. Cool on a rack for a minimum of 30 minutes before serving.

Apple varieties I used in my final pie.

Apple varieties I used in my final pie.

Filling Apple Pie.gif
In Dessert, Fall, Pie, Recipe, Winter, Holiday Recipes Tags pie, Dessert, Apple, Heirloom Recipe, Thanksgiving, Christmas, Holiday Pie
1 Comment
← Newer Posts Older Posts →
 

of the dirt blog

I believe there is a necessity for us to be connected to our food. It makes us aware of seasons and life cycles. It reminds us that vital functions on earth are unplugged. It gives us a unique way to express creativity and build community. I hope the recipes and thoughts shared here Inspire you to make something delicious for someone you love (or just yourself!).


BLOG AUTHOR

Sarah Ward is the Editor of Taste of the South magazine. Currently enjoying life in Birmingham, AL with her husband and their polydactyl cat, Jack.

Sarah Ward is the Editor of Taste of the South magazine. Currently enjoying life in Birmingham, AL with her husband and their polydactyl cat, Jack.


search for recipes


Follow @ofthedirt on instagram

This weekend, a group of friends and talented bakers held another bake sale. With a short 7 days of planning and 4 days of advertising, this small group of kickass women raised over $1,000 selling hand pies, cookies, and pastries. To everyone who sup
🎉GIVEAWAY!!! Want to win a free box of homemade pastries?! There are a few ways to win: 

Birmingham Locals: 
1. Tag your local friends below and spread the word about our bake sale fundraiser. Each tag is an entry. TWO winners will be chosen tomorr
HAPPY FALL!!!!!!! It’s my favorite time of year and for the first time that I can remember, it actually feels like fall outside in Alabama! To celebrate, make a batch of these Pumpkin Oatmeal Chocolate Chunk Cookies...they use a whole jar of @t
It was 68 degrees here today and everyone was hoarding the fall products at Trader Joe’s yesterday (I actually witnessed a woman frantically grab 6 hand soaps, 5 candles, and 3 of every pumpkin-filled-treat thing they had). BUT I’ve got o
Quick pickles are one of the best flavor tools to keep on hand. They brighten up any dish - eggs, tacos, toast, salads, chili, sandwiches, pretty much anything that goes with vinegar. And, they’re so easy to make! (You don’t really even n

Let's Keep in Touch!

Get new recipes delivered right to your email. 

Thank you! Looking forward to staying in touch.

For now, head on over and say hi here. 

© Sarah Ward and of the dirt, 2017. Unauthorized use and/or duplication of the photographs and recipes without express and written permission from this blog’s author and/or owner is strictly prohibited. Excerpts and links may be used, provided that full and clear credit is given to Sarah Ward and of the dirt with appropriate and specific direction to the original content.