• Home
  • Blog
  • Basics + Pantry Staples
  • Preservation
  • Desserts & Sweets
  • Breakfast
  • Entrees & One-dish Meals
  • Salads + Sides
  • Soups & Stews
  • 10 Minute Recipes
  • About
  • Say Hello
  • Portfolio
Menu

of the dirt

Street Address
San Diego, CA
Phone Number
an exploration of food and culture

Your Custom Text Here

of the dirt

  • Home
  • Blog
  • Recipes
    • Basics + Pantry Staples
    • Preservation
    • Desserts & Sweets
    • Breakfast
    • Entrees & One-dish Meals
    • Salads + Sides
    • Soups & Stews
    • 10 Minute Recipes
  • About
  • Say Hello
  • Portfolio

Watermelon Raspberry Popsicles

August 21, 2015 Sarah Ward

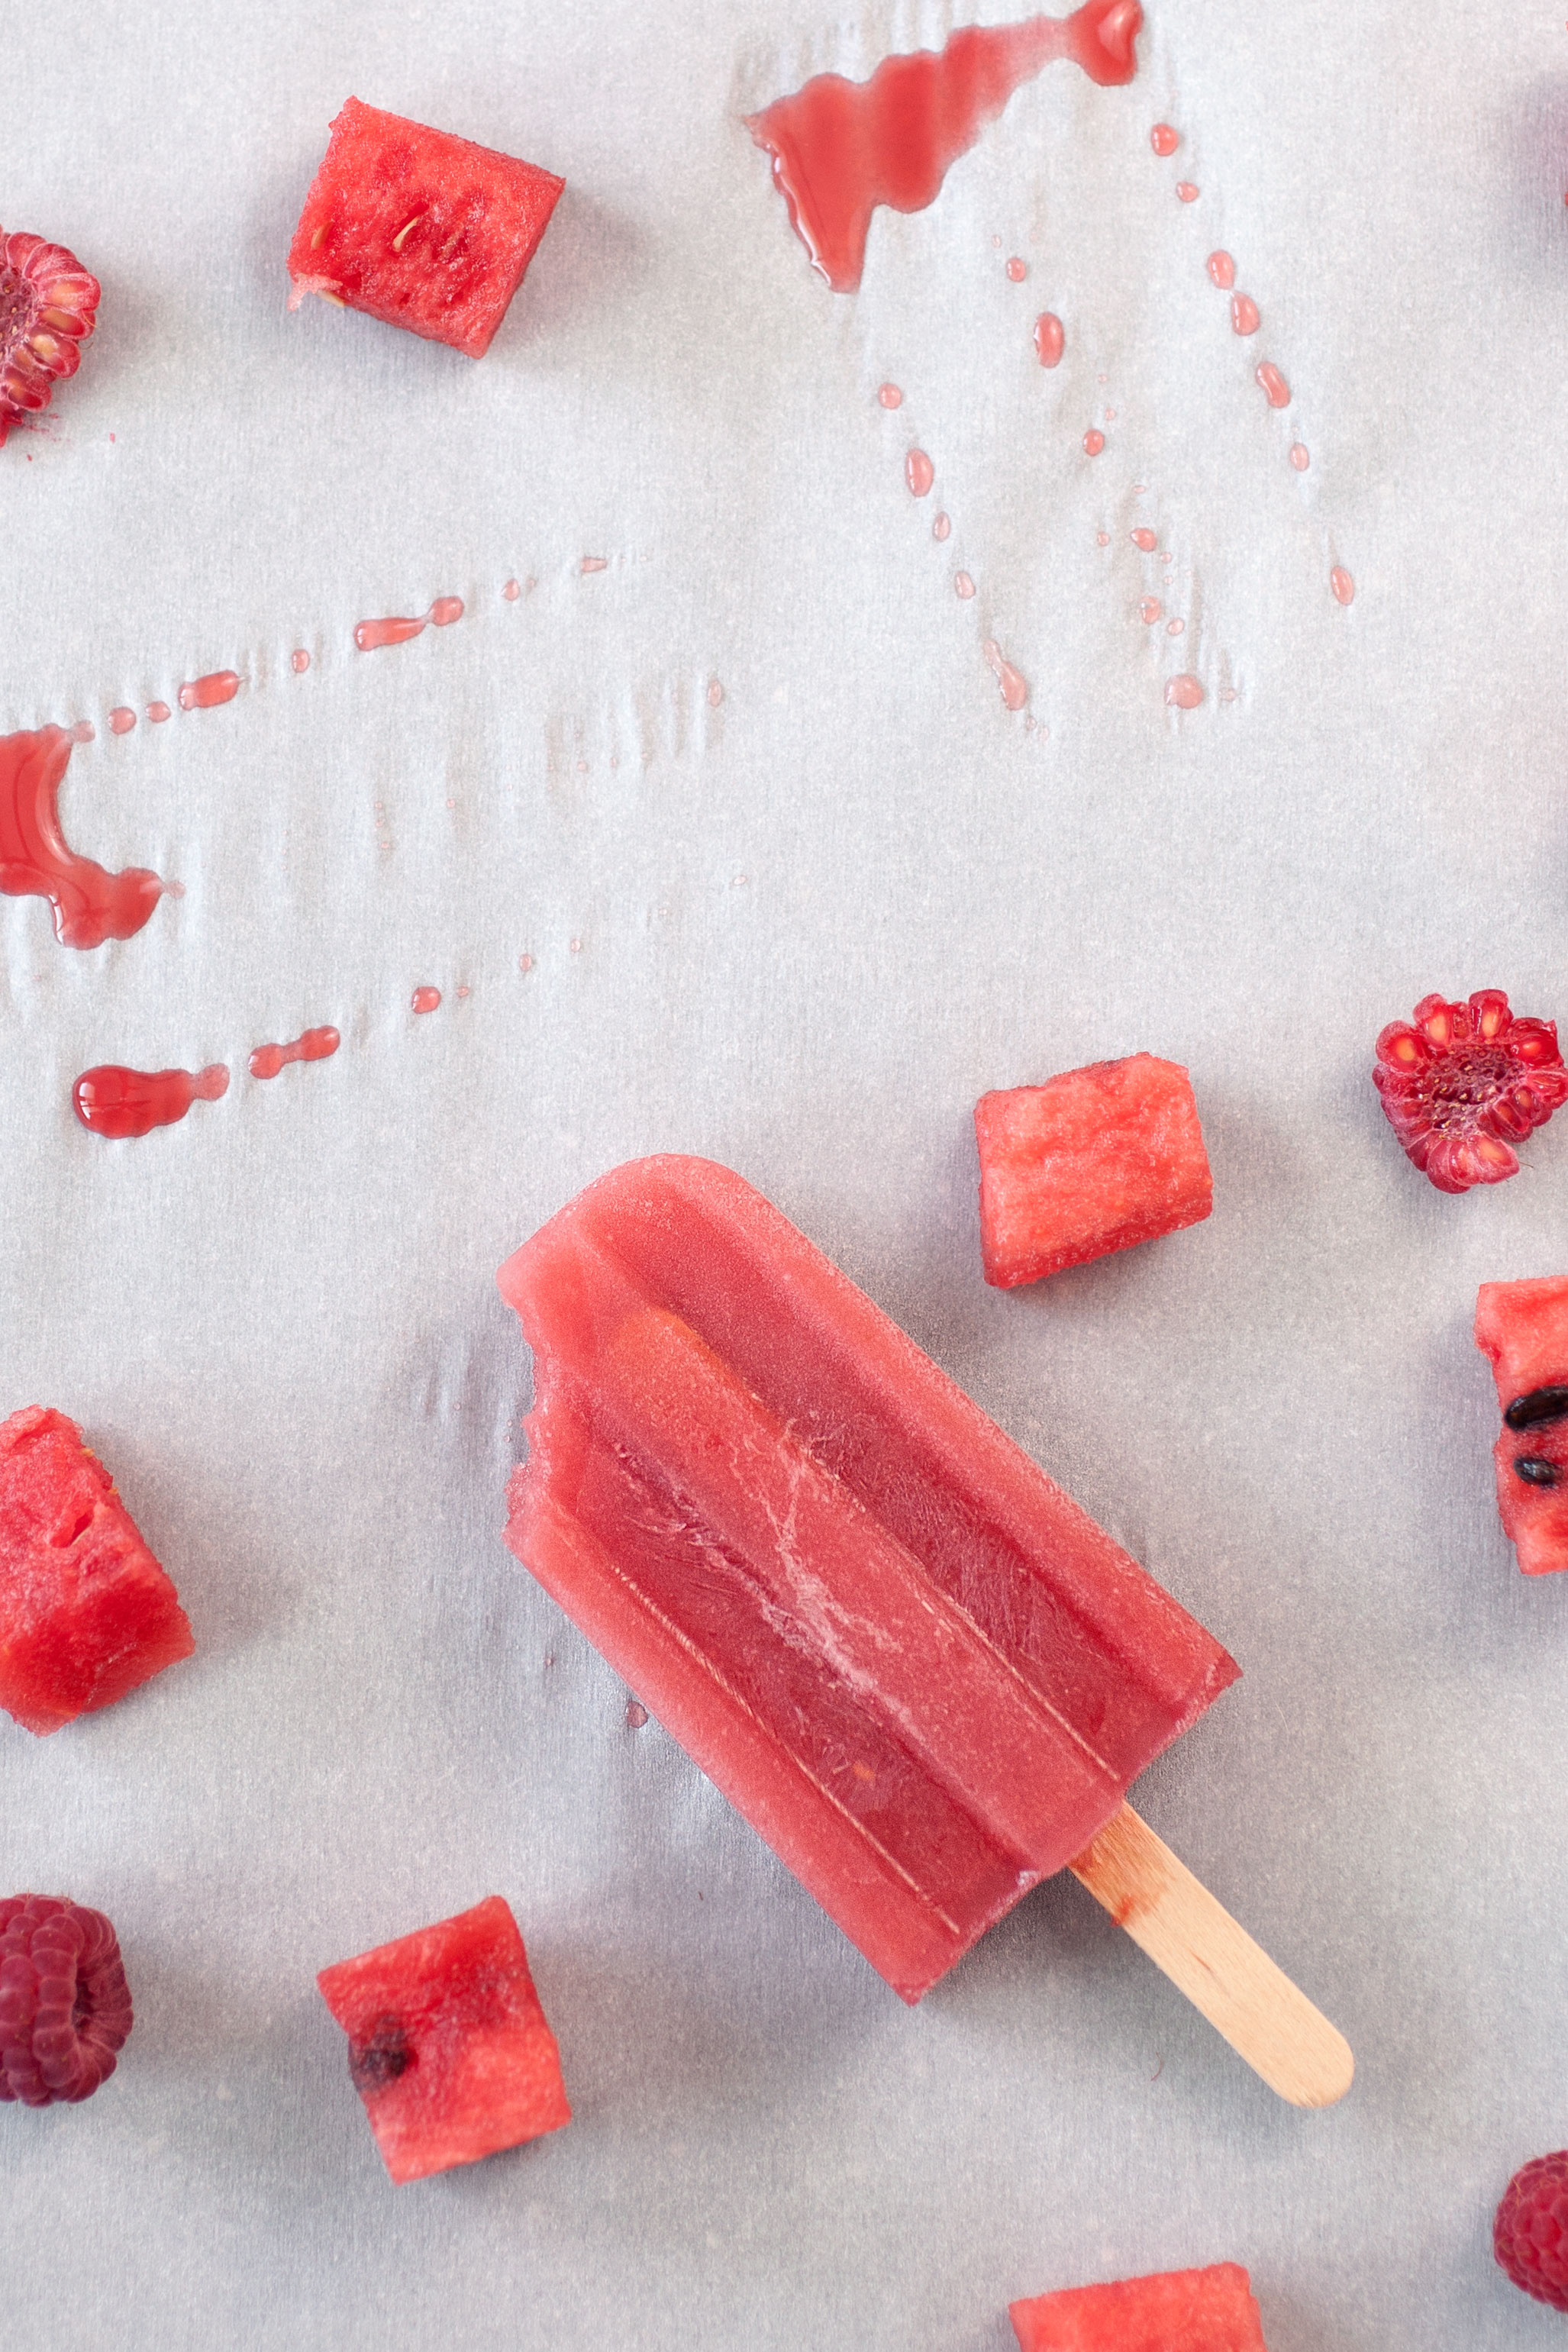
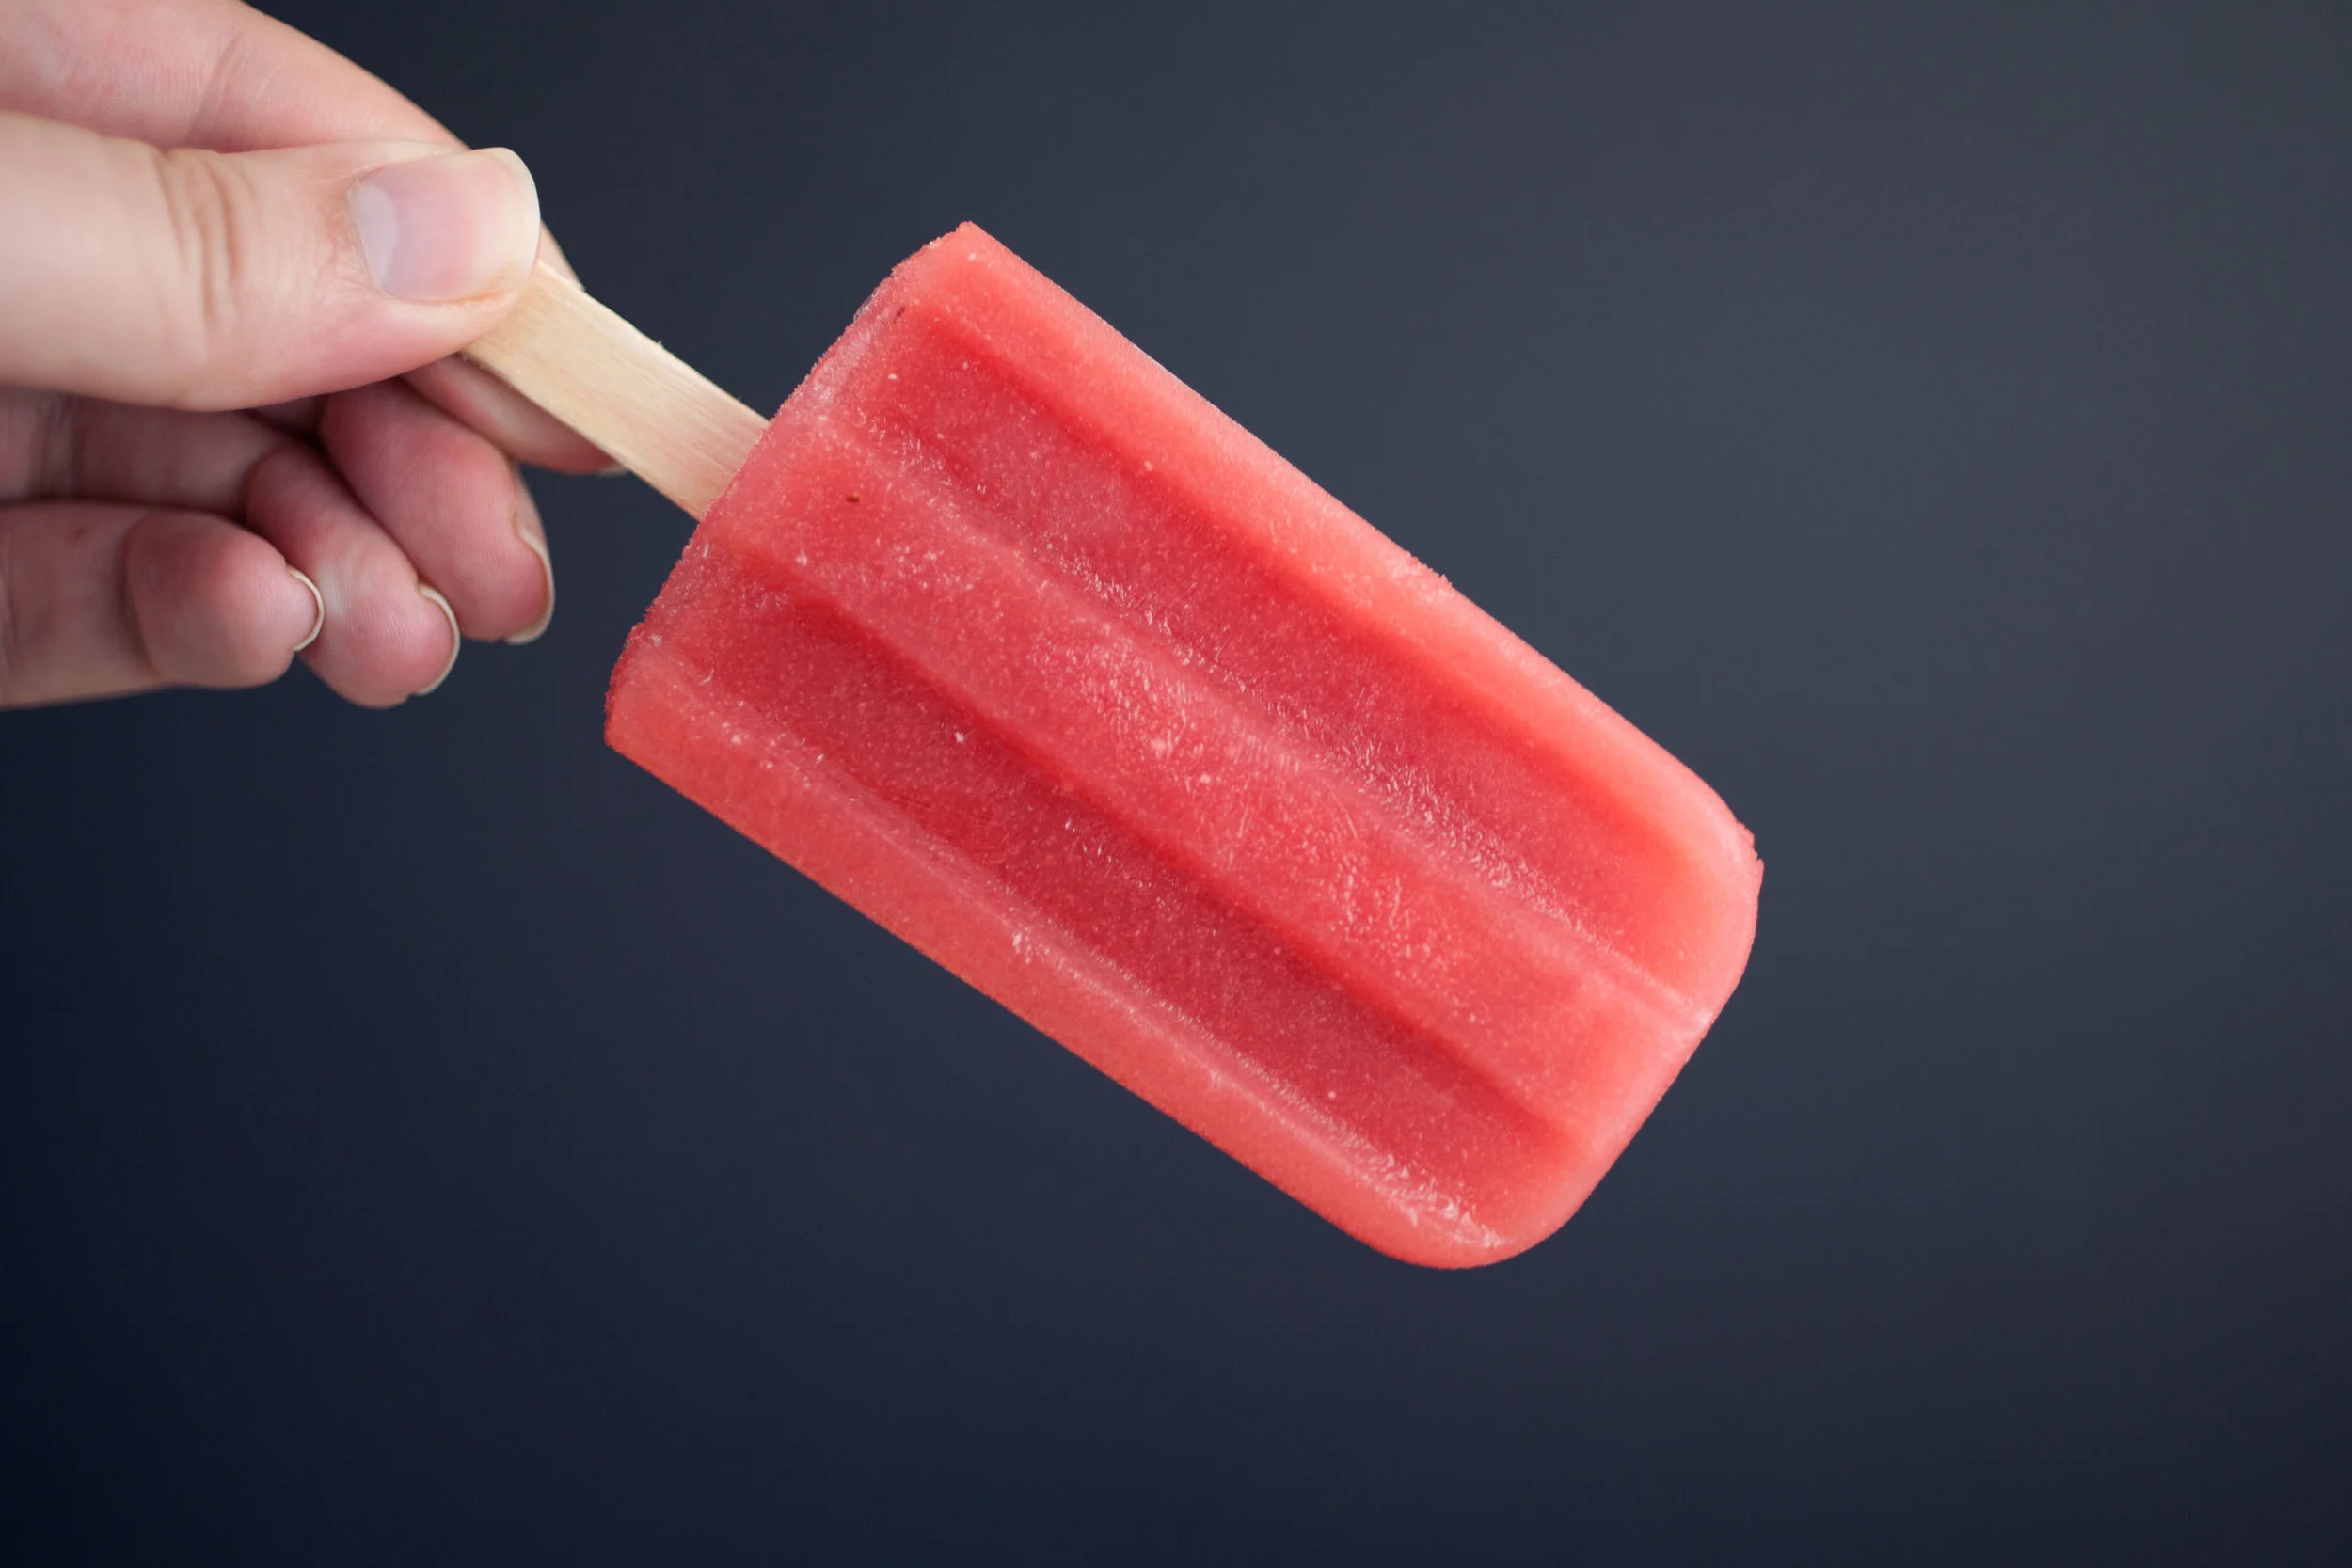
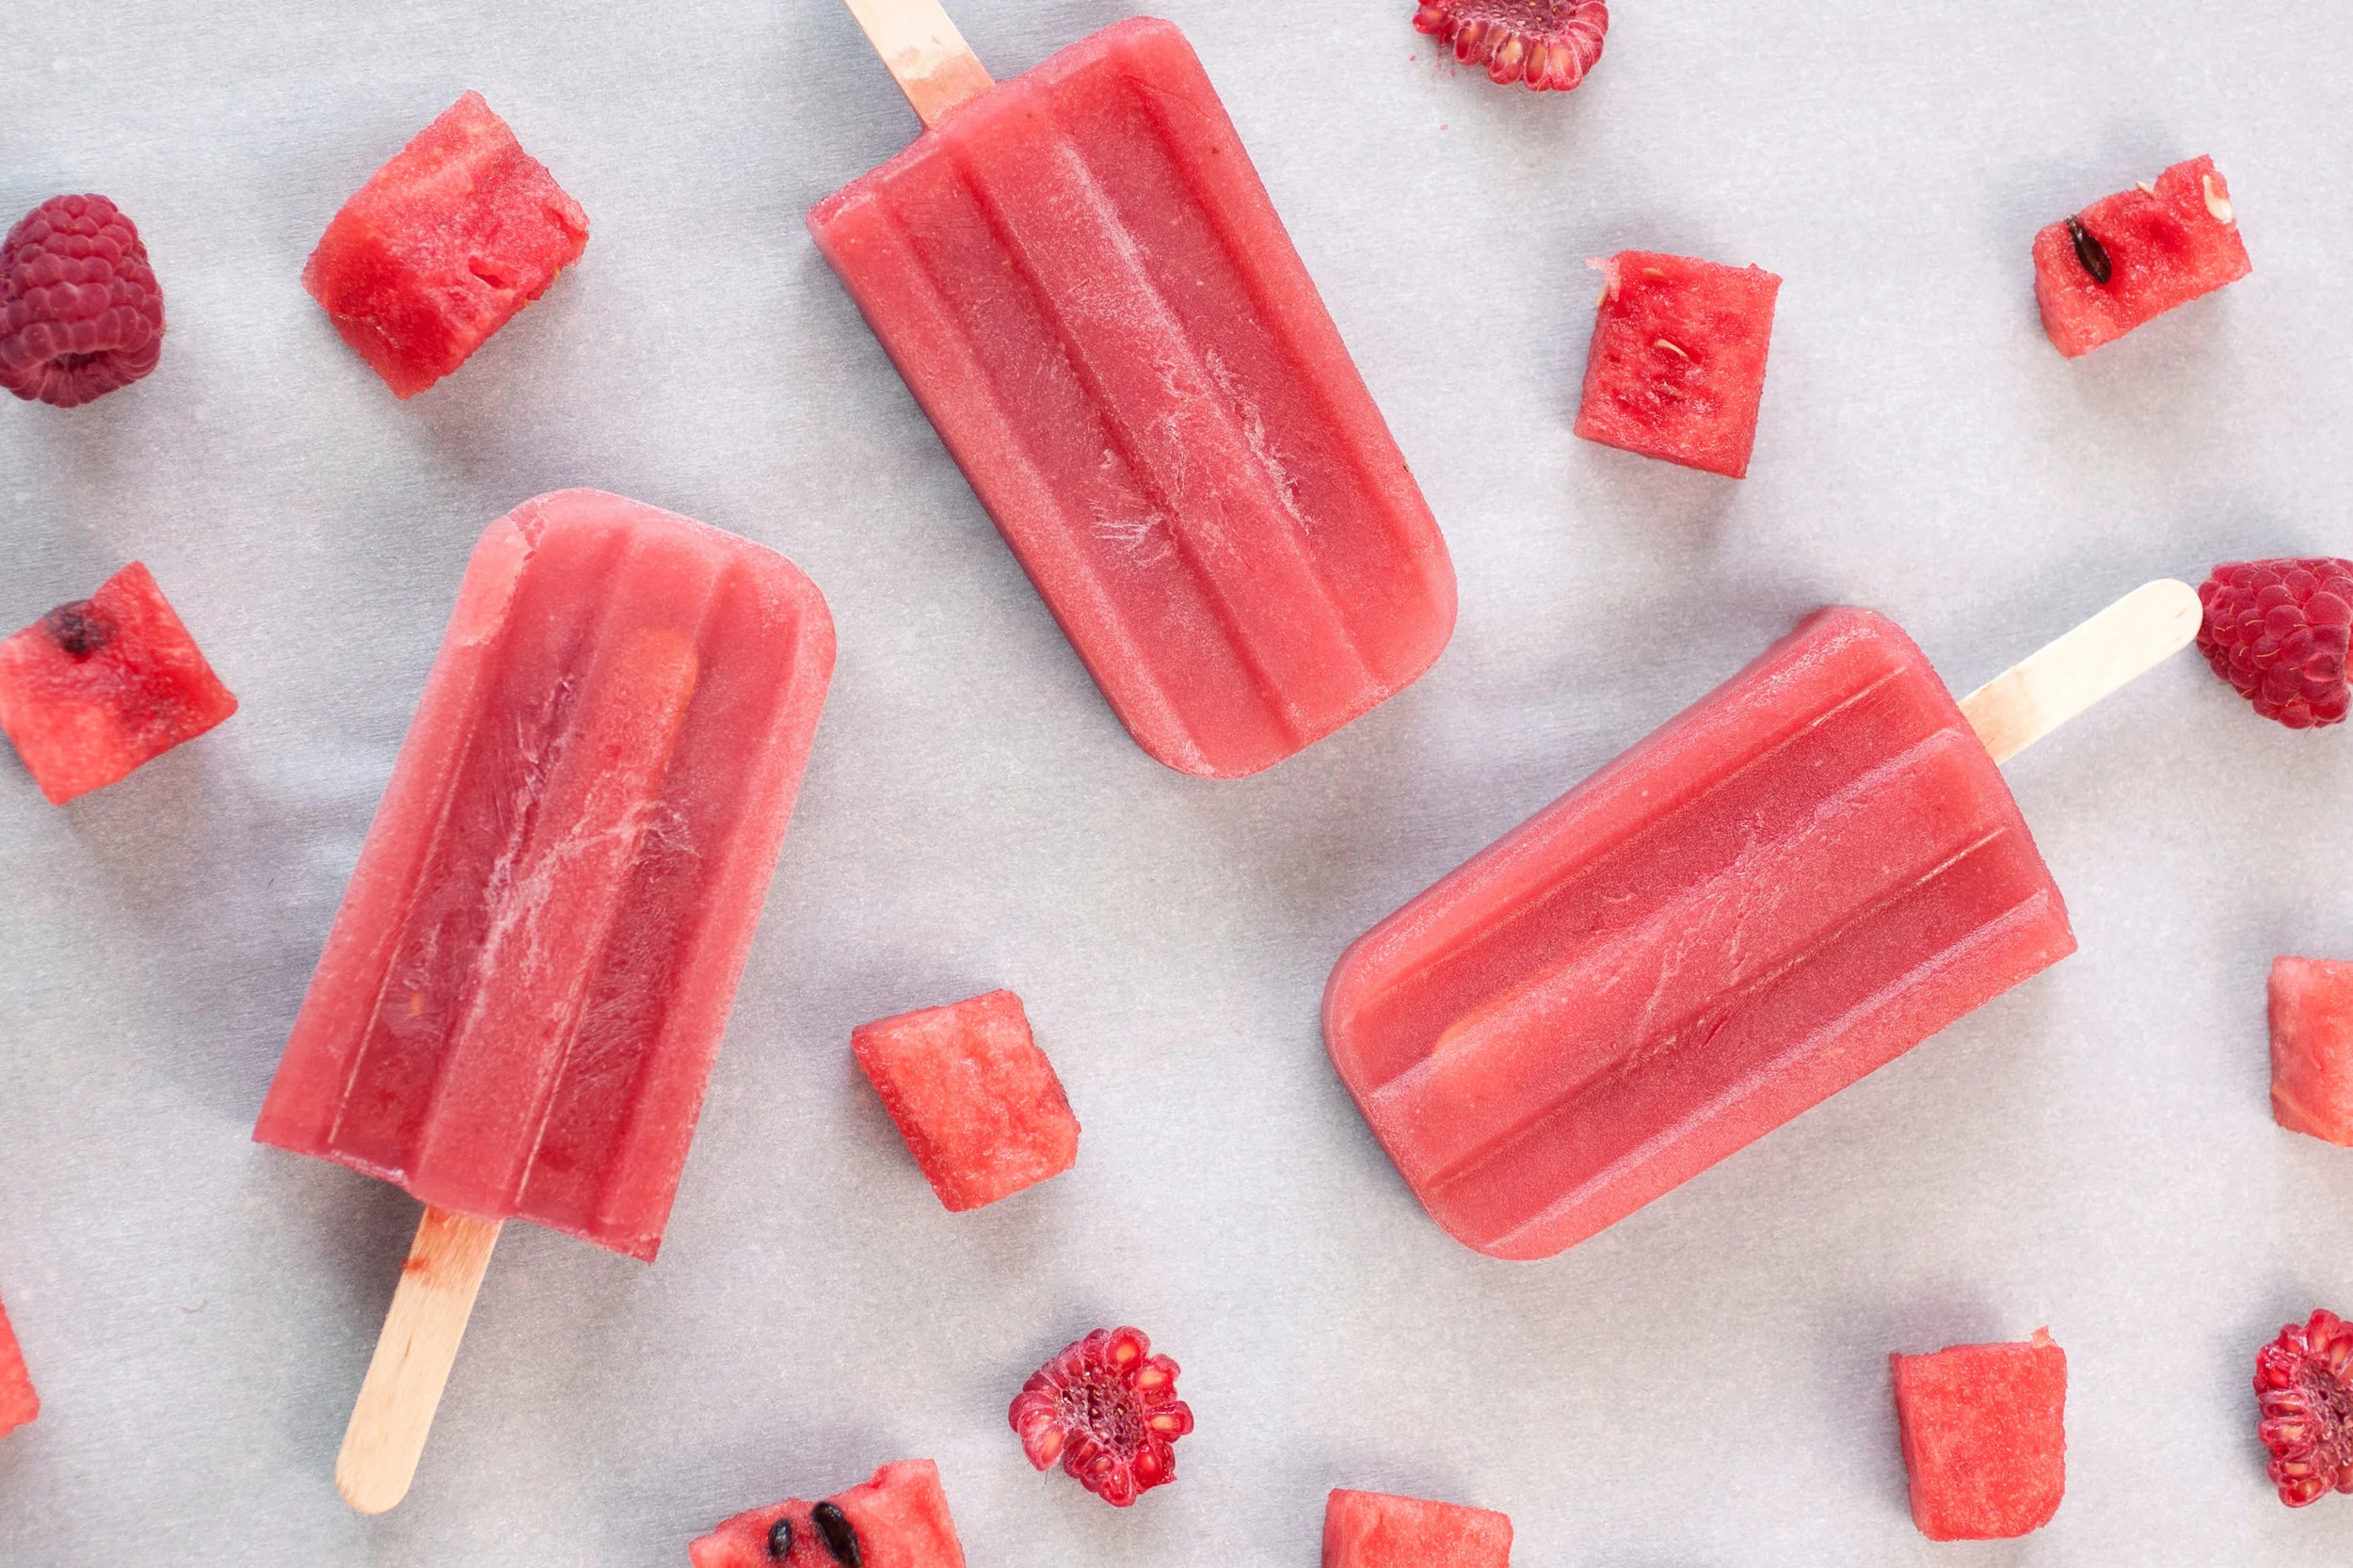
As of this week, I had consumed 0 watermelon this summer. That's blasphemy for a girl that grew up in Alabama and ate her weight in watermelon as a kid. I love watermelon in all forms - watermelon salad, gilled watermelon, watermelon snow cones, Italian ice, lollipops, jolly ranchers - if it's watermelon (flavored) somethin' I'm most likely to try it (and probably love it).   To rectify this lack of sweet summer fruit in my life and inspired by our current heat wave, I decided to make popsicles. They are incredibly easy (and delicious). If you don't have a true popsicle mold, don't worry. You can use small paper dixie cups or anything of similar size. I ordered this mold off Amazon. 


Watermelon Raspberry Popsicles

  • 3 heaping cups, cubed watermelon 
  • 1 cup fresh raspberries
  • 1/2 cup mint simple syrup (below)
  • Juice of half a lime

Combine all ingredients in a blender and blend on medium speed for 1-2 minutes. The goal here is to liquify all of the fruit without breaking the seeds up too much. Strain through a fine mesh sieve into a large pourable container. Scrape the inside bottom of the sieve with a spoon as it drains in order to push the fruit pulp through.  

Fill your molds 90% of the way with your strained watermelon mixture - you want to leave room for the liquid to expand as it freezes. If you're using a traditional popsicle mold, place your sticks in now. If you're using something alternative, like a dixie cup, let the filled cups stand in the freezer for 2 hours (to allow it to harden just a bit) before you insert the sticks. You can also cover the top with a plastic wrap, secure with a rubber band or tape, and then poke the stick through before freezing. Freeze your popsicles on a level surface for 6 hours or overnight. 

To remove from the mold, run warm over the outside of the mold for 3 seconds. If the popsicles don't want to budge, don't force them out - continue running them under the water for 3 seconds increments until they come loose. 

Mint Simple Syrup

  • 1/2 cup filtered water
  • 1/4 cup sugar
  • 1/2 cup mint leaves, tightly packed

Place water and sugar in a small sauce pan over medium heat. Stir until the sugar is fully dissolved. Remove from heat and add mint leaves. Let the leaves steep for 1.5 - 2 hrs. Strain and discard leaves. 

In Recipe, Summer, Dessert, Frozen Tags Watermelon, Raspberry, Popsicle
Comment

Tahitian Squash and Drunken Apple Pie

November 4, 2013 Sarah Ward
photo (40).jpg

Tahitian Squash and Drunken Apple Pie

My parents were in town this week, visiting from the land of fire flies and the best fried catfish you can find- Alabama. Since my brother and I moved out here, they've been visiting a couple of times a year and it's become a regular activity to visits San Diego's Little Italy Farmers Market. If you live in the area and have never been, or you are planning on visiting San Diego, put this on your list of must-do's. This time around, we picked up a 7 pound Tahitian squash from one of my favorite booths- Schaner Farms. Some of the nicest people and best produce (and eggs). With so much squash on hand, I decided to take a twist on a traditional pumpkin pie, lighten it up a bit and add bit more fall flare with pink lady apples from another farmer's booth just down the street. 

I used a 12 in cast iron pan, but you can use a regular pie pan if you don't have one; however, you might end up with a bit of the filling left over.


Pie crust

  • 1 Basic Pie Dough

Tahitian squash filling

  • 3 lbs of Tahitian squash, baked (about 2.5 cups cooked/smashed)
  • 6 oz. low or nonfat plain greek yogurt
  • 1 cup of coconut crystals
  • 3 egg yolks
  • 1 tsp vanilla extract
  • 1 ts ground ginger
  • 1 tbs ground cinnamon
  • 1/2 tsp ground cardamom

Druken apples

  • 2 apples (suggested: 1 pink lady, 1 fuji or jonagold)
  • 1 cup spiced rum
  • 1 tsp cinnamon
  • 1/2 tsp ground ginger
  • 2 tbs whole wheat flour


Heat your oven to 375 degrees.

To begin, peel, core, quarter and thinly sliced your apples. Your slices should be about 1/8 in thick. Place in a small, shallow pan and cover with spiced rum. Set aside while you prep the rest of your pie. Be sure to stir your apples a couple of times to ensure they are all getting soaked in the rum.  

Roll out your chilled whole wheat pie crust in a circle until about 1/8 inch think, or until it’s large enough to slightly extend over the side of your pan (I chose a 10” cast iron skillet and it baked wonderfully). Place rolled dough in the pan, form to the sides and trim off excess, using the edge as a guide for your knife.

In a food processor, place all ingredients for the Tahitian squash filling. Process until smooth (about 30 sec - 1 minute). Set aside. Drain the apples and add the remaining ingredients. Gently shake or toss until all slices are evenly coated.

Pour squash filling into your pie crust. Begin placing apple slices in a circle, starting on the outer edge and working your way around and then into the middle (you can use the photo as a reference, but get creative and have fun, adding your own flair). When finished, there should be about a ½ inch gap between the top of the apples to the edge of the pie crust.

Gently fold the crust over the edge of the apples and tuck the edge back a little. Again, get creative! Place in the oven with a piece of foil laid on top. Bake for an hour and 15 minutes or until the center doesn’t giggle when you gently shake the pan.

Let the pie cool for 45 minutes. Best served, slightly warm and with a cup of hot coffee or chai.


Yields 6-8 servings. 

Yields 6-8 servings. 

In Pie, Dessert, Recipe, Fall, Winter Tags Apple, Squash, Whole Wheat, Crust, Rum, Cardamom
Comment
← Newer Posts
 

of the dirt blog

I believe there is a necessity for us to be connected to our food. It makes us aware of seasons and life cycles. It reminds us that vital functions on earth are unplugged. It gives us a unique way to express creativity and build community. I hope the recipes and thoughts shared here Inspire you to make something delicious for someone you love (or just yourself!).


BLOG AUTHOR

Sarah Ward is the Editor of Taste of the South magazine. Currently enjoying life in Birmingham, AL with her husband and their polydactyl cat, Jack.

Sarah Ward is the Editor of Taste of the South magazine. Currently enjoying life in Birmingham, AL with her husband and their polydactyl cat, Jack.


search for recipes


Follow @ofthedirt on instagram

This weekend, a group of friends and talented bakers held another bake sale. With a short 7 days of planning and 4 days of advertising, this small group of kickass women raised over $1,000 selling hand pies, cookies, and pastries. To everyone who sup
🎉GIVEAWAY!!! Want to win a free box of homemade pastries?! There are a few ways to win: 

Birmingham Locals: 
1. Tag your local friends below and spread the word about our bake sale fundraiser. Each tag is an entry. TWO winners will be chosen tomorr
HAPPY FALL!!!!!!! It’s my favorite time of year and for the first time that I can remember, it actually feels like fall outside in Alabama! To celebrate, make a batch of these Pumpkin Oatmeal Chocolate Chunk Cookies...they use a whole jar of @t
It was 68 degrees here today and everyone was hoarding the fall products at Trader Joe’s yesterday (I actually witnessed a woman frantically grab 6 hand soaps, 5 candles, and 3 of every pumpkin-filled-treat thing they had). BUT I’ve got o
Quick pickles are one of the best flavor tools to keep on hand. They brighten up any dish - eggs, tacos, toast, salads, chili, sandwiches, pretty much anything that goes with vinegar. And, they’re so easy to make! (You don’t really even n

Let's Keep in Touch!

Get new recipes delivered right to your email. 

Thank you! Looking forward to staying in touch.

For now, head on over and say hi here. 

© Sarah Ward and of the dirt, 2017. Unauthorized use and/or duplication of the photographs and recipes without express and written permission from this blog’s author and/or owner is strictly prohibited. Excerpts and links may be used, provided that full and clear credit is given to Sarah Ward and of the dirt with appropriate and specific direction to the original content.