• Home
  • Blog
  • Basics + Pantry Staples
  • Preservation
  • Desserts & Sweets
  • Breakfast
  • Entrees & One-dish Meals
  • Salads + Sides
  • Soups & Stews
  • 10 Minute Recipes
  • About
  • Say Hello
  • Portfolio
Menu

of the dirt

Street Address
San Diego, CA
Phone Number
an exploration of food and culture

Your Custom Text Here

of the dirt

  • Home
  • Blog
  • Recipes
    • Basics + Pantry Staples
    • Preservation
    • Desserts & Sweets
    • Breakfast
    • Entrees & One-dish Meals
    • Salads + Sides
    • Soups & Stews
    • 10 Minute Recipes
  • About
  • Say Hello
  • Portfolio

Homemade Hummus

May 9, 2020 Sarah Ward
Nut Butter Hummus_020_sRGB.jpg

Switching up the Tahini

While traditional hummus recipes call for tahini, some people don’t love it’s taste (aka my husband Christopher) or don’t use it regularly so they don’t justify the purchase. I started making batches with other nut butters, and it’s literally changed my hummus eating world. I love a very traditional spread, but something about the added depth of roasted almond butter really hits the spot. I’ve used peanut butter (natural and no-stir), roasted and raw almond butter, regular tahini, cashew butter, and black tahini (made from black sesame seeds). Use whatever you’ve got or like!

We eat a lot hummus in our house. My husband’s go-to lunch at home is a hummus and PB sandwich. (I thought it was weird at first too, and then I put peanut butter in my hummus and it’s really good. Try it!) While we very often just buy containers from the grocery store, making it at home is really easy and much more cost effective. With a can of chickpeas, a few tablespoons of your preferred nut butter, and some pantry staples, you’re on your way to a tasty snack in about 10 minutes.

There are many things I love about hummus including it’s protein rich nature, but it’s such a great blank canvas to play with. Once you have a base recipe, you can add any type of flavors that you want - roasted red peppers, curry paste, all sorts of fresh herbs, spice mixes, etc. It’s also a great way to use up some little bits of condiments, pickled items, or spices you have floating around your fridge and pantry. I’ve included four of my favorite flavor combinations below, but I’d encourage you to play around with what you like!


HOMEMADE HUMMUS - 5 WAYS

Makes about 2 cups

IngredieNts

Basic Hummus

  • 1 (15-oz) can chickpeas, drained

  • ¼ cup plain yogurt (optional)

  • 2 tablespoons nut butter (tahini, almond, peanut)

  • ¼ cup olive oil

  • 4 garlic cloves

  • Juice of 1 lime or small lemon

  • 1 tsp ground cumin

  • ½ tsp kosher salt

  • ⅛ tsp cayenne pepper (optional)

Method

  1. Combine all ingredients in the container of a food processor. Blend for 5 minutes, until very smooth and warm to the touch. Transfer to a serving bowl or an airtight container. (For best flavor, cover and let hummus stand for at least an hour before eating.)

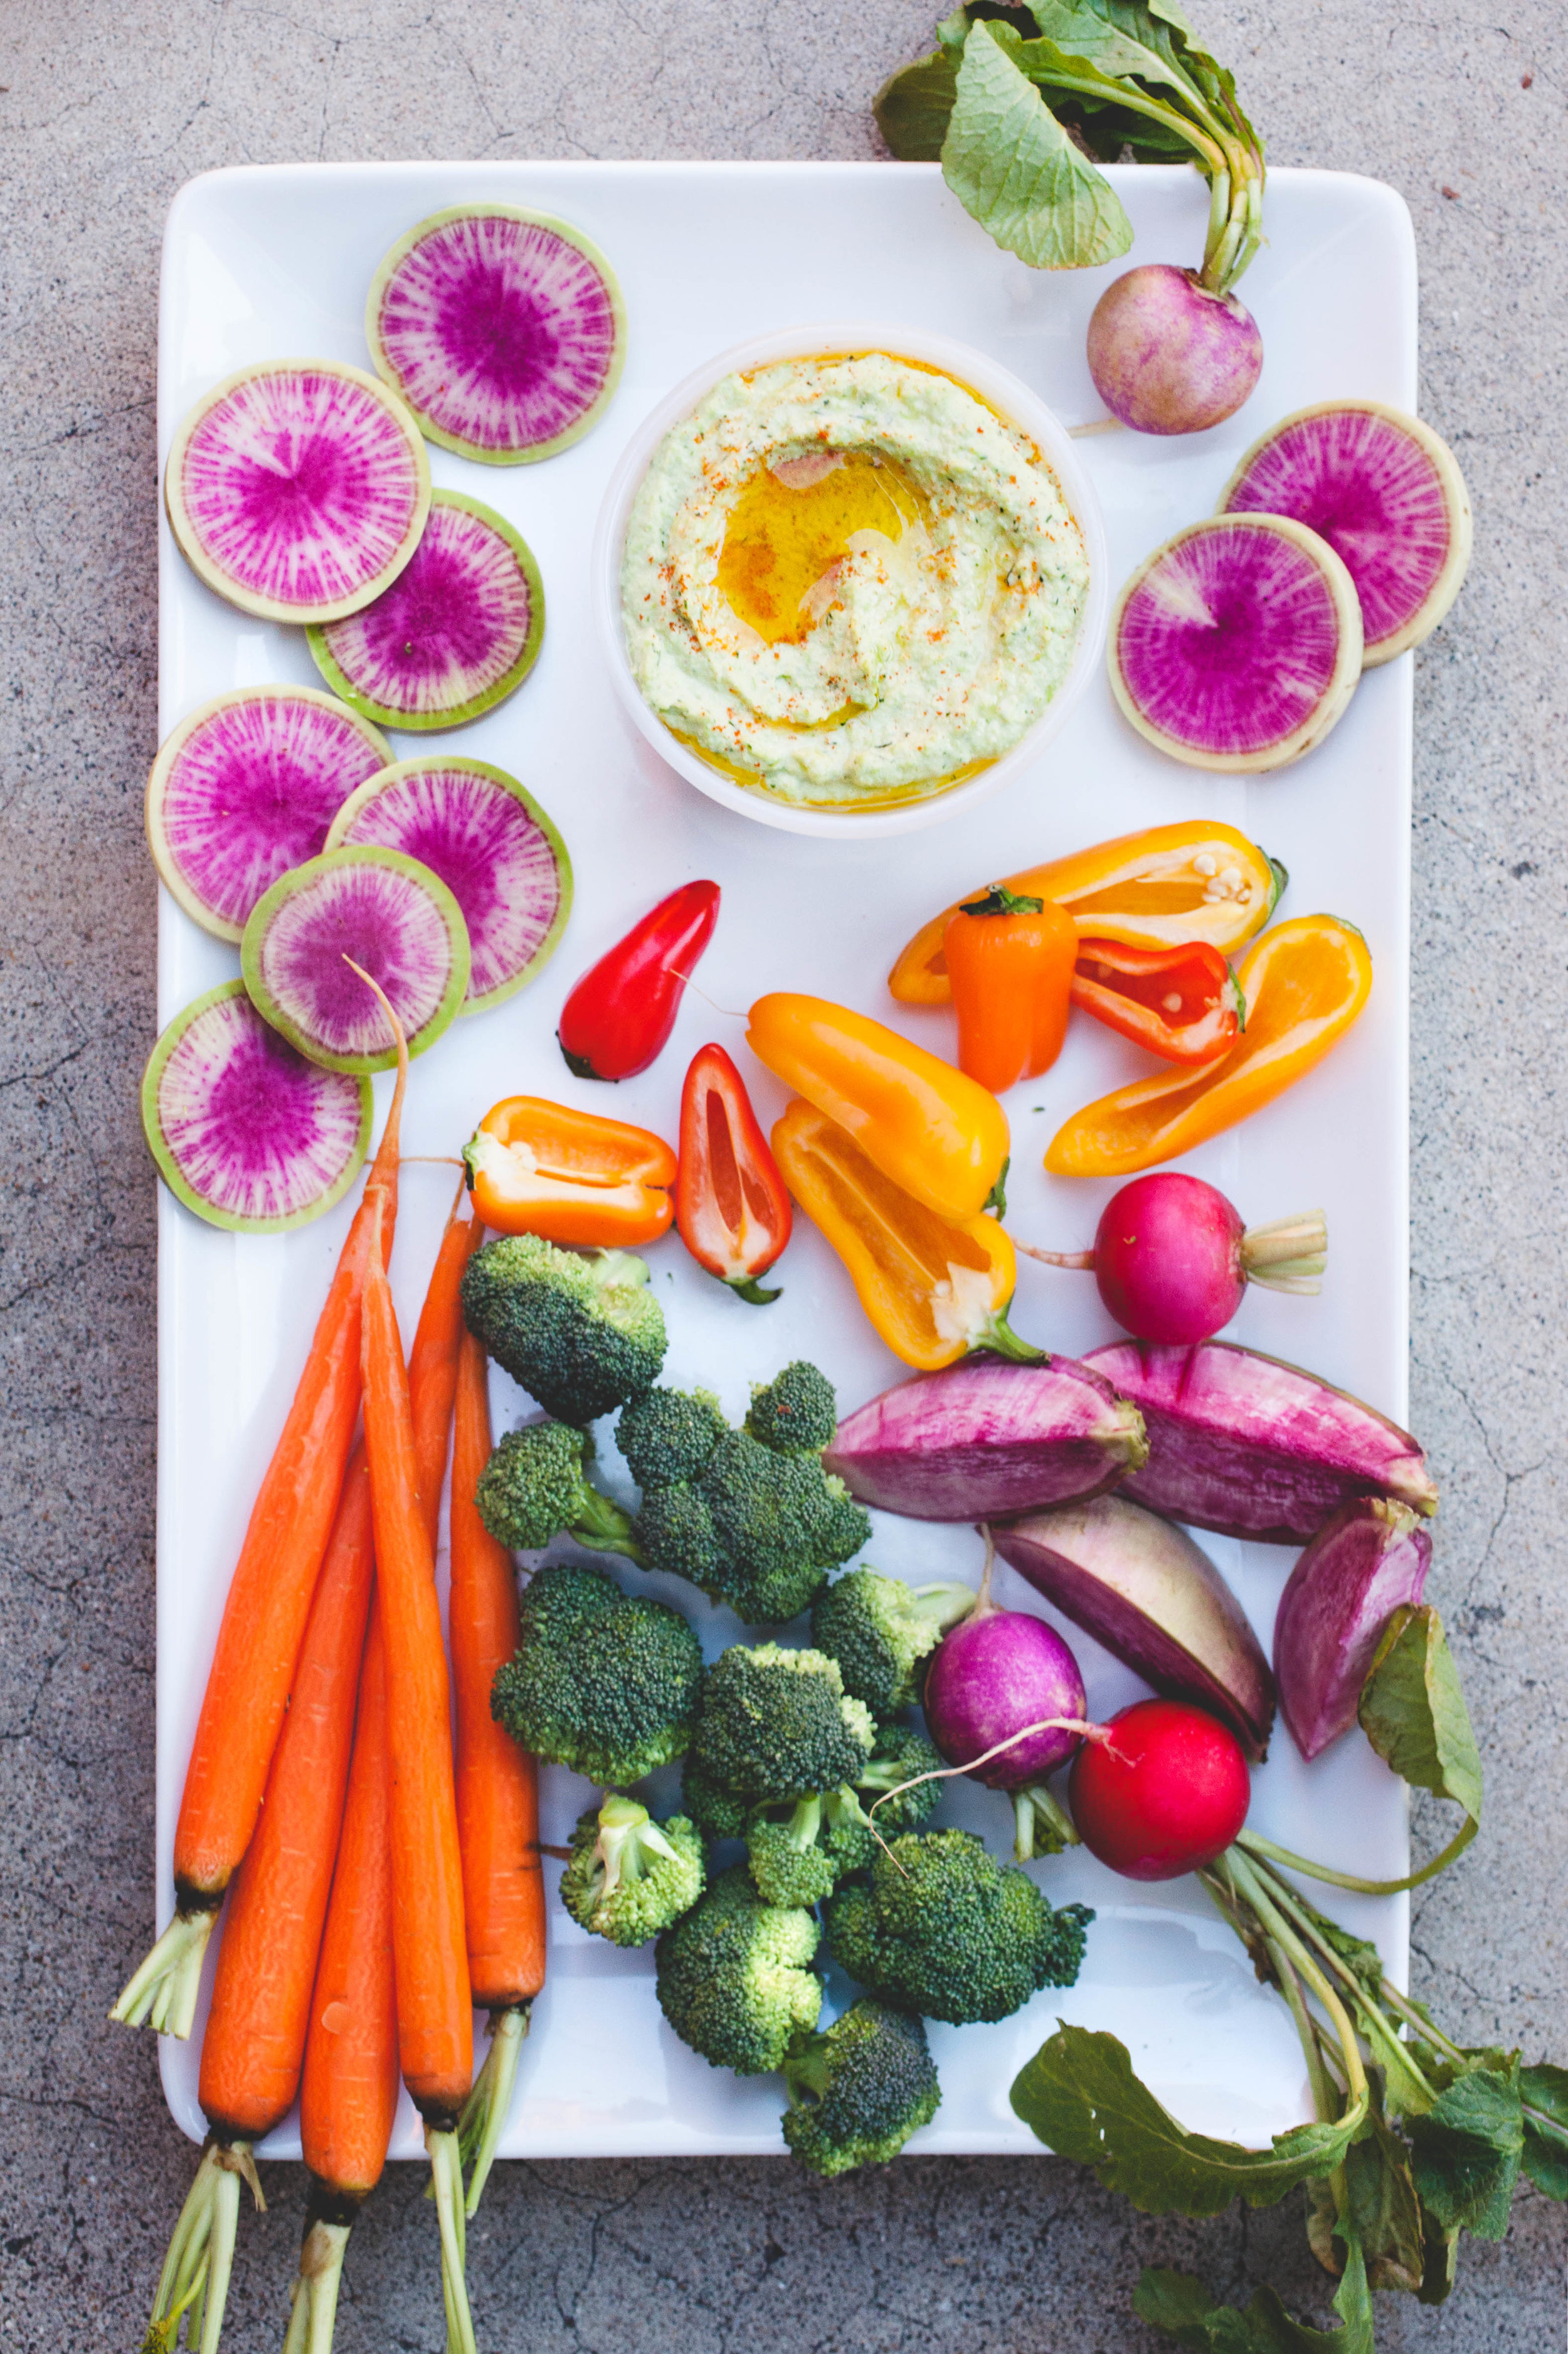
  2. Serve with pita and garden fresh vegetables. Refrigerate in an airtight container a good swirl of olive oil to coat the top for up to 5 days.


Kalamata Olive and Black Pepper

To Basic Hummus, add 1/4 cup kalamata olives, 2 tablespoons almond butter, and 1/2 teaspoon ground black pepper. Top with olives and olive oil.

Kalamata+Olive-Almond+Butter+Hummus_004_sRGB.jpg

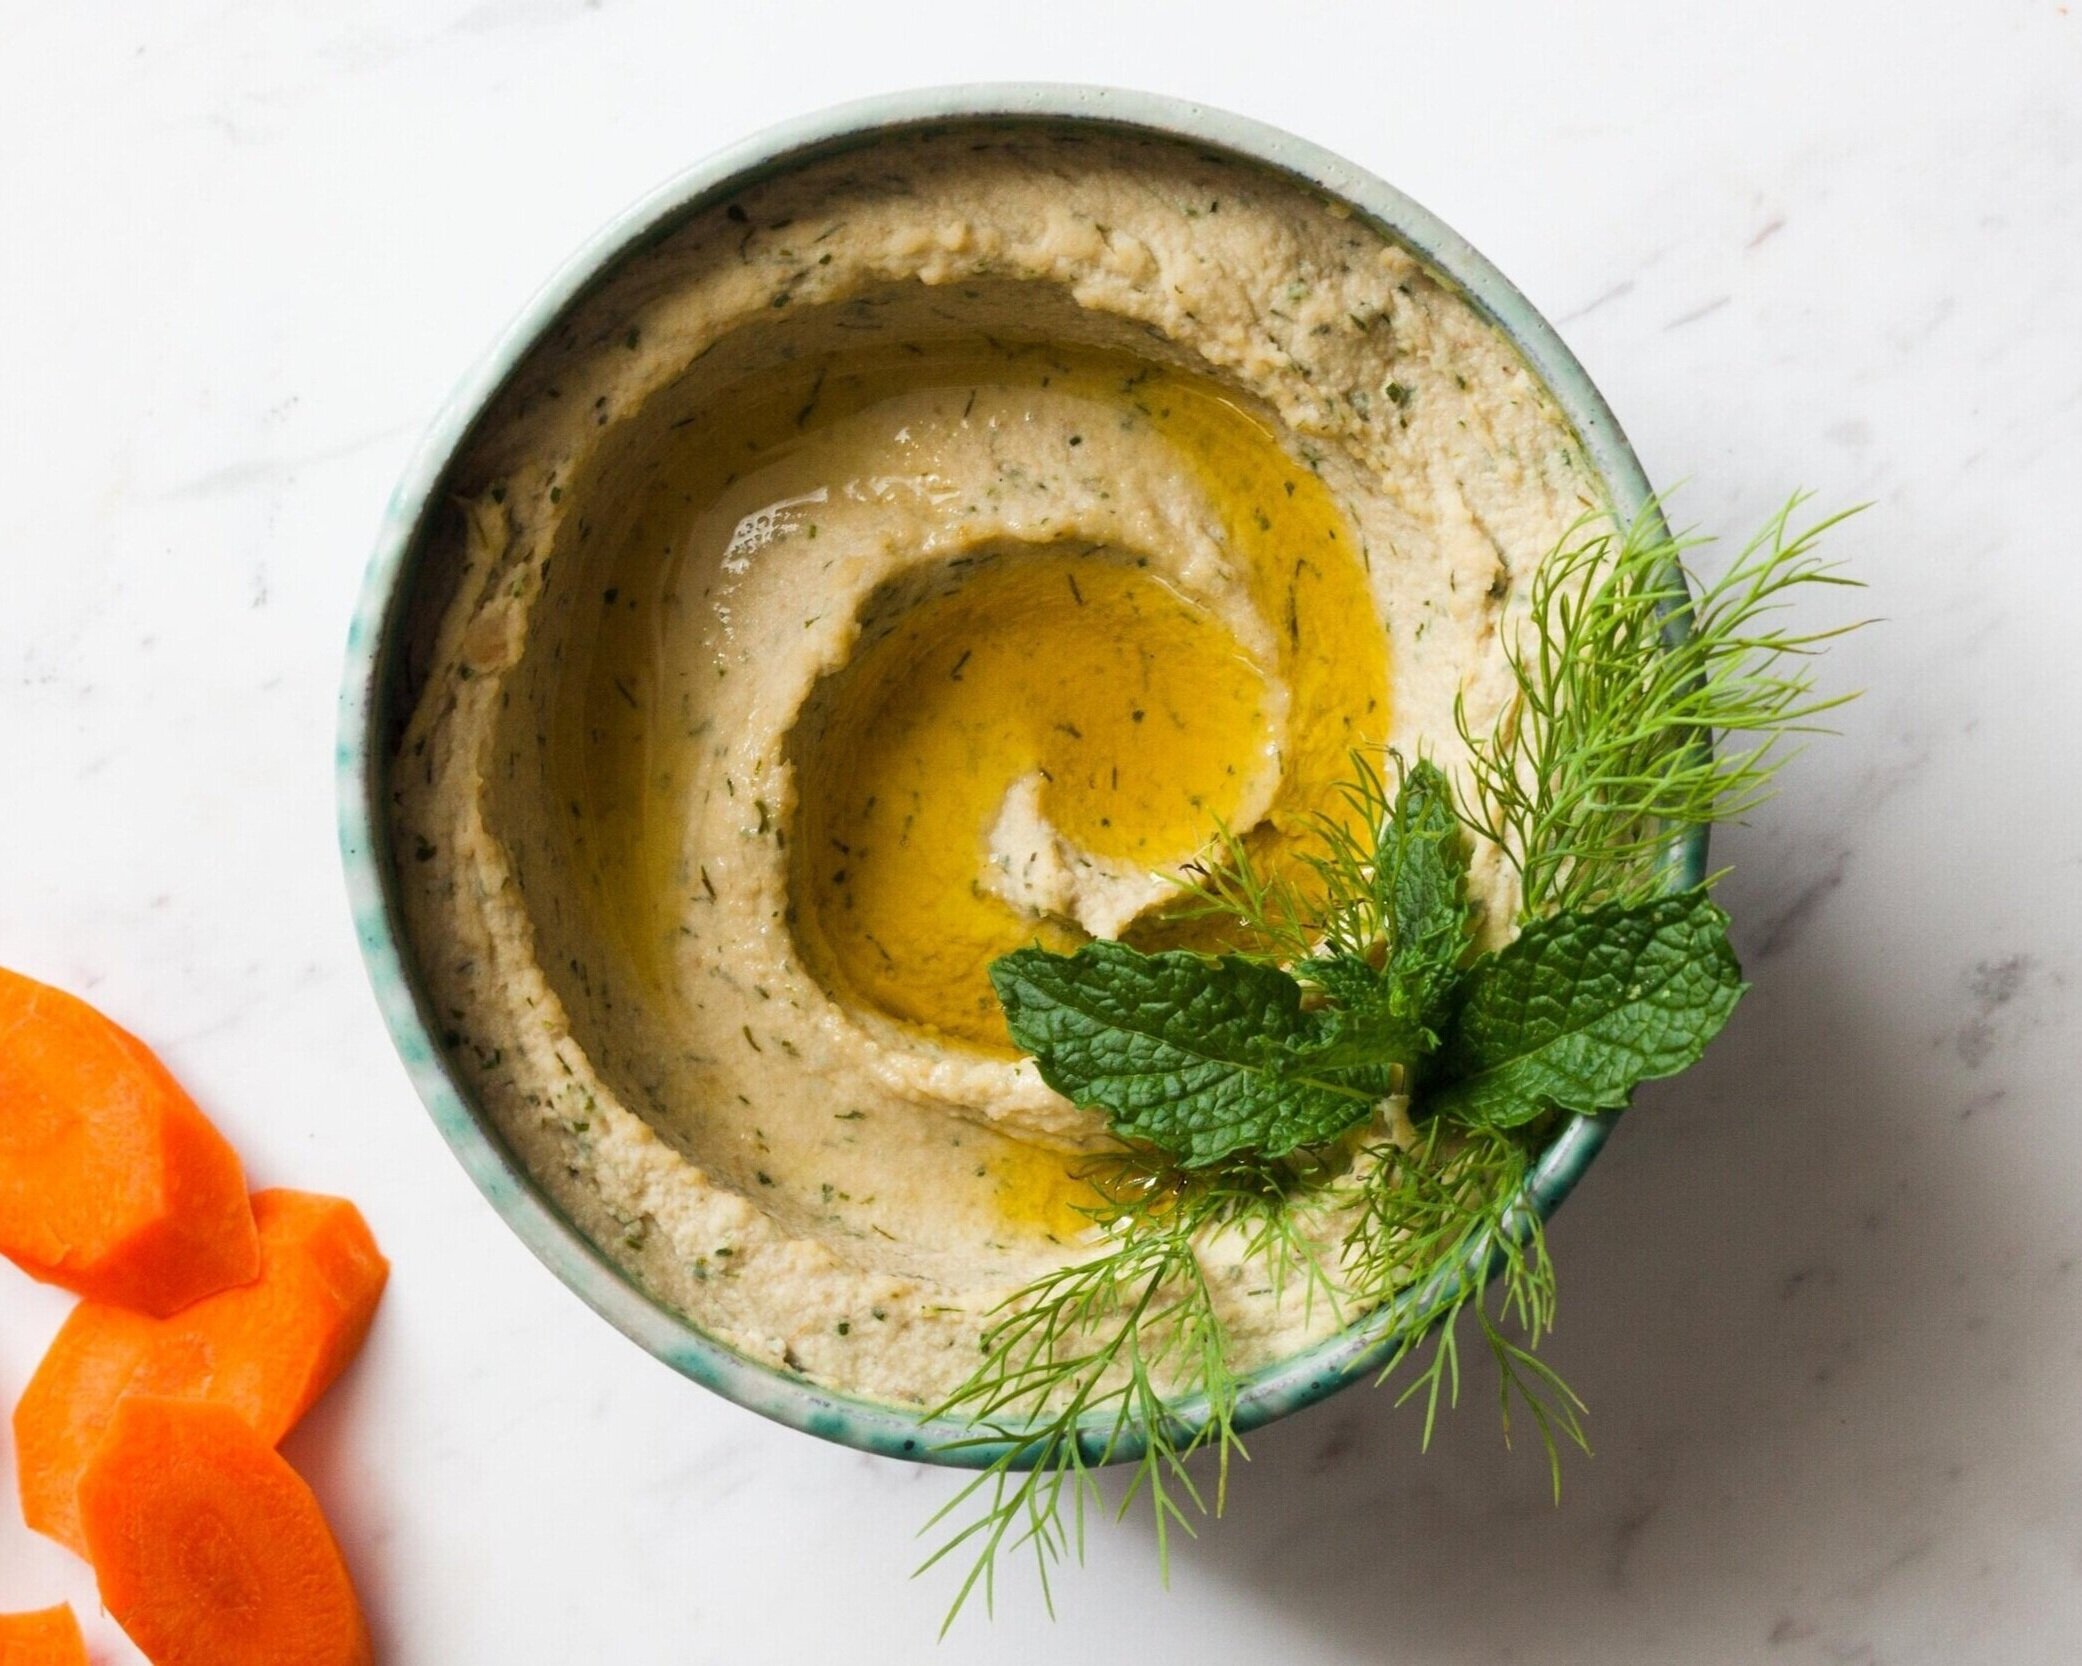
Dill and Mint Hummus

To Basic Hummus, add a handful of fresh dill sprigs and fresh mint leaves. Top with olive oil and fresh herbs.

Dill%252Band%252BMint%252BHummus_003_sRGB.jpg

Harissa Hummus

To Basic Hummus, add 2 to 3 tablespoons harissa paste and 2 tablespoons peanut butter. Top with peanuts and chili oil.
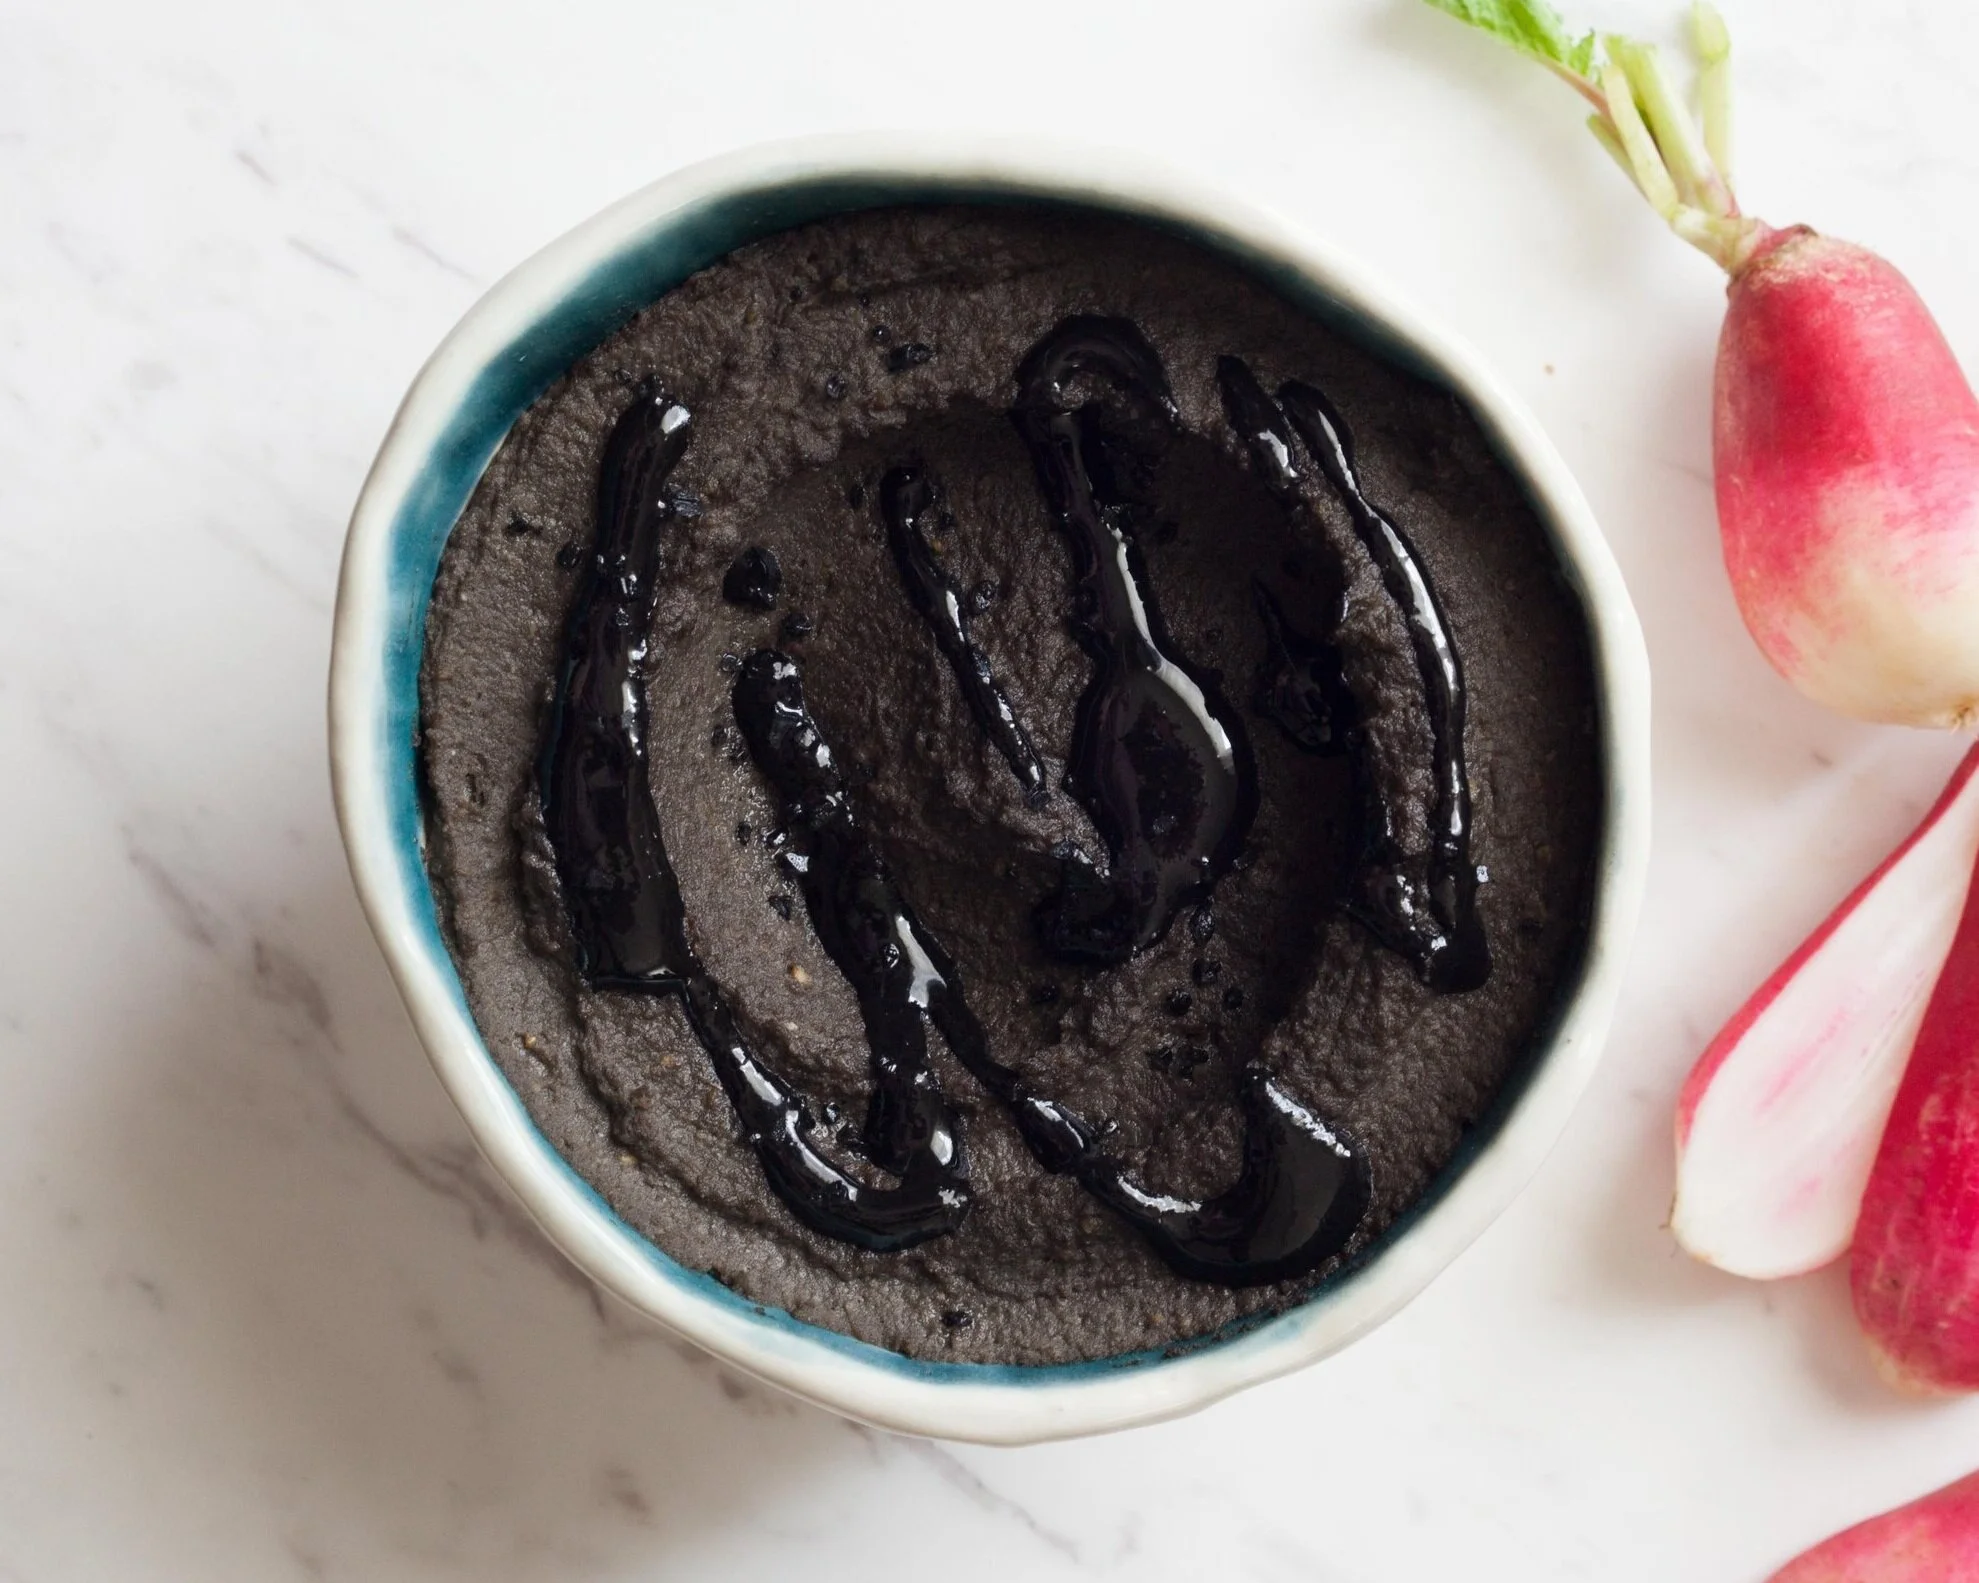
Harissa-Peanut+Butter+Hummus_003_sRGB.jpg

Black Sesame Hummus

To Basic Hummus, use black sesame tahini instead of regular tahini. Top with addition tahini and black salt.

Black+Sesame+Tahini+Hummus_002_sRGB.jpg

In 10 Minute Recipes, Accessories, Gluten-Free, Recipe, Raw, Salads + Sides, Vegetarian, Vegan
Comment

Blackberry Glazed Green Beans

June 30, 2019 Sarah Ward
Blackberry Glazed Green Beans_136_sRGB.jpg

Blackberry and rosemary has long been a favorite flavor combination of mine. I’ve combined them into pies and jams on multiple occasion, as blackberries lend themselves towards sweets so easily and rosemary adds a surprising yet delicious savory note. But, I’ve been wanting to explore using them in a savory fashion. While legumes and fruit may not be the most immediate pairing that springs to mind, it’s a delicious one. These two summer treats have a short overlapping harvest period so add them to your next cookout or Sunday supper plans.

The beans in this dish are cooked until they’re crisp tender - the perfect way to eat them in my opinion - and get a sweet glaze from sticky blackberry jam. Fresh berries add pops of juicy flavor and the addition of balsamic vinegar, salt, and rosemary helps round everything out. This side dish is perfect serving alongside grilled chicken or pan seared fish.


Blackberry Glazed Green Beans

Makes 4 to 6 servings

ingredients

  • 2 tablespoons butter or oil

  • 1 large shallot, thinly sliced

  • 2 fresh rosemary sprigs

  • 1 pound fresh green beans, stem ends snipped

  • ¼ cup blackberry jam

  • 2 tablespoons white wine or water

  • 1 tablespoon balsamic vinegar

  • ½ teaspoon kosher salt

  • Pinch red pepper flakes

  • Handful fresh blackberries (optional)

  • Ground black pepper

Method

  1. In a large skillet or enameled cast-iron braiser over medium heat, melt butter. Add shallots and rosemary; saute for a few minutes until shallots begin to soften. Add green beans and cook, covered, stirring occasionally for 3 minutes.

  2. In a small bowl, whisk together jam, wine, vinegar, salt, and pepper flakes. Pour over beans and stir to coat. Continue cooking, stirring frequently until beans are crisp tender and sauce thickens to a syrupy consistency, about 3 minutes. Toss in fresh blackberries, if desired, and cook for another minute. Remove from heat. Finish with freshly ground black pepper and serve immediately.

Blackberry Glazed Green Beans_023_sRGB.jpg


In 10 Minute Recipes, Recipe, Salads + Sides, Sides, Summer Tags green beans, Blackberries, rosemary, side dish
Comment

Peach Grilled Cheese

July 8, 2018 Sarah Ward
Peach-Basil Grilled Cheese_028_sRGB.jpg

I have to admit, I'm much more of a fall and winter person. I don't particularly love hot weather or being eaten by bugs when stepping foot outside. I do, however, have a great appreciation for Summer's necessity in our food system, and peaches are what make the heat and humidity worth it. For the past seven summers, I've roamed San Diego's market in search of sweet and juicy peaches. My wanderings have led me to some good finds - floral white peaches from Sweet Tree Farms, sweet donut (or Saturn) peaches from Jacey's Farm, and a young crop of little ones from Good Taste Farm. Each delicious and flavorful in their own way. However, I still found myself longing for the peaches that grow about an hour south of my hometown - big, juicy, rosy-cheeked Chilton County yellow peaches. I love these peaches so much that when we'd take a trip back to Alabama in the summer, I'd designate my carryon bag to be filled solely with these (carefully packed) peaches.

This summer, I find myself back to living about an hour north of these orchards. And while I also find myself deeply missing my San Diego market wanderings, I am loving the ability to drive to the nearest farm stand or Pepperplace Farmer's Market to buy a few pounds. What I love most  about peaches is their ability to go between sweet and savory applications seamlessly, more so that any other summer produce (in my opinion). From pizza topping to ice cream, caprese salads to skillet cakes, peaches can (and should) be enjoyed in as many forms as possible while in peak season. 

One of my favorite ways to enjoy them is in a grilled cheese. Paired with a fresh herb, some soft cheeses, a salty cured meat or pickle, and a zip from spice or vinegar, it's an unbeatable quick lunch especially post farmer's market shopping when you're looking for the fastest way to get from produce basket to tastebuds. I've written up what's essentially a non-recipe and more of a guide for using what you have on hand to make one delicious sweet and savory sandwich. 


Peach Grilled Cheese

  • Thick sliced sourdough or your favorite bread
  • Soft cheese (cream cheese, labneh, goat)
  • Sliced or grated melting cheese (mozzarella, brie, gruyere)
  • Sliced cured meat, pickles, or other fresh produce
  • Fresh peach, thinly sliced
  • Fresh herbs
  • Condiments: Preserves, vinegar glaze, hot sauce
  • Ghee, butter, or oil

Start by spreading your bread slices with the soft cheese. Then, start stacking your ingredients on one bread slice. (I like to alternate ingredients, dispersing the melting cheese amongst the rest so that everything melds together when being grilled.) Drizzle over your condiment(s), and top with the remaining bread slice.

Heat a teaspoon of ghee in a pan over medium-low heat until melted. Swirl to coat. Add your sandwich and cover; cook for 3 minute undisturbed. Lift slightly with a spatula to see if bread is browned. Continue cooking, covered until it's toasted to your preference. Flip, and cover, and repeat. When toasted to your preference, remove the sandwich and let it stands for a few minutes before slicing. This will help it set slightly so it doesn't fall apart when eating. 


Some of my preferred flavor combinations are below!

PEACH-BASIL (pictured)

Brie & labneh
Basil
Salami
Pepper jelly

Peach Caprese

Goat cheese & gruyere
Tarragon or chives
Thinly sliced heirloom tomato
Balsamic glaze
 

Peach-Chipotle

Cream cheese & mozzarella
Cilantro
Red onion
Chipotle hot sauce

Peach-Basil Grilled Cheese_001_sRGB.jpg
In 10 Minute Recipes, Summer, Entree Tags Peaches, Sandwich
Comment

Edamame Hummus

May 18, 2017 Sarah Ward

If you're in search of an easy and delicious hummus recipe but want something a bit different than the traditional chickpea dip, this edamame hummus is just the right fix! Edamame beans, when pureed, aren't as dense as chickpeas so the texture of this hummus is light, almost fluffy, but strong enough to hold deep flavors and a satisfying bite. The light green color of this hummus is a beautiful compliment to your fresh seasonal produce.

I like making a meal out of hummus by serving it with a variety of fresh vegetables, a few slices of pita bread and a little bowl of olives and feta in olive oil. Add a variety of fresh herbs to your hummus for additional flavor or mix it up when you make a new batch by adding in varying combinations of herbs (cilantro, dill + mint, basil + chives), roasted peppers, or a teaspoon of curry powder. 

You can find the recipe on Bonnie Plants' website by clicking the button or image, below.

get the recipe!
In 10 Minute Recipes, Bonnie Plants Recipes, Salads + Sides, Recipe Tags Hummus, vegetarian
Comment

10 Minute Recipes: Summer Fridge Pickles

June 19, 2016 Sarah Ward
A special shout out and Happy Father's Day to my dad - the guy who taught me everything there is to love about pickles and photography. Here's to combing both in dedication to you :). 

The seasons are definitely starting to change here in San Diego - we're exiting the days of May Grays and June Glooms and hitting our desert heat waves. This weekend brought one with vengeance. I know, for those of you who live in places where it's 98 F and 100% humidity, I shouldn't complain. But, 95 F in a city that doesn't believe in A/C is no fun. Especially if you need or want to get in your kitchen and cook. 

Summer is one of those seasons that seems to bring foods that need (or rather, deserve) pickles, but with soaring temps, the last thing you want to do is heat up your kitchen with boiling vinegar and a canning water bath. Well, here's your perfect solution - a pickle that you can prep in 10 minutes, set in the fridge, and do nothing else but enjoy it the following day. No heat, no turning your kitchen into a steamy sauna, and no need to make 10 jars at a time. This recipe yields one perfect pint jar of summery pickles. And, if you use watermelon radishes, they may even have a delightful pink hue by the end. 

An added bonus to not using heat - the full nutritional value of the vegetables and apple cider vinegar is maintained. I would recommend using a good quality vinegar (Bragg's is my personal favorite). The acidity of these pickles is somewhat mild. If you prefer a more pungent pickle, add additional vinegar and 1 tsp sugar and 1/8 tsp salt per ounce of added vinegar. 


SUMMER FRIDGE PICKLES

  • 1/2 cup apple cider vinegar
  • 1 tbsp sugar
  • 3/4 tsp kosher salt
  • 1/8 tsp of each: fennel seeds, celery seeds, minced ginger
  • 1/4 tsp of each: peppercorns, mustard seeds, dill seeds (or 1 dill flower)
  • 2 cups sliced cucumber, radish, and/or summer squash
  • Several chives or chive blossoms
  • Chili pepper, optional
  • Filtered water

In a glass pint jar or container of similar size, add vinegar, sugar, salt and spices. Secure the lid and shake vigorously for 30 seconds. Remove the lid and add the sliced vegetables, chives, and chili pepper, if desired. 

Fill the jar with filtered water up to 1/2" below the brim. Secure the lid again, gently shake a few times, and place in the fridge overnight (or for at least 4 hours). These pickles will keep in the fridge for up to two months. 

Yield: 1 pint jar


In 10 Minute Recipes, Preserved Foods, Recipe, Summer, Raw, Basics & Pantry Staples Tags Pickles, Summer, Radish, Cucumber, Dill, Chive Blossoms, Raw
Comment
Older Posts →
 

of the dirt blog

I believe there is a necessity for us to be connected to our food. It makes us aware of seasons and life cycles. It reminds us that vital functions on earth are unplugged. It gives us a unique way to express creativity and build community. I hope the recipes and thoughts shared here Inspire you to make something delicious for someone you love (or just yourself!).


BLOG AUTHOR

Sarah Ward is the Editor of Taste of the South magazine. Currently enjoying life in Birmingham, AL with her husband and their polydactyl cat, Jack.

Sarah Ward is the Editor of Taste of the South magazine. Currently enjoying life in Birmingham, AL with her husband and their polydactyl cat, Jack.


search for recipes


Follow @ofthedirt on instagram

This weekend, a group of friends and talented bakers held another bake sale. With a short 7 days of planning and 4 days of advertising, this small group of kickass women raised over $1,000 selling hand pies, cookies, and pastries. To everyone who sup
🎉GIVEAWAY!!! Want to win a free box of homemade pastries?! There are a few ways to win: 

Birmingham Locals: 
1. Tag your local friends below and spread the word about our bake sale fundraiser. Each tag is an entry. TWO winners will be chosen tomorr
HAPPY FALL!!!!!!! It’s my favorite time of year and for the first time that I can remember, it actually feels like fall outside in Alabama! To celebrate, make a batch of these Pumpkin Oatmeal Chocolate Chunk Cookies...they use a whole jar of @t
It was 68 degrees here today and everyone was hoarding the fall products at Trader Joe’s yesterday (I actually witnessed a woman frantically grab 6 hand soaps, 5 candles, and 3 of every pumpkin-filled-treat thing they had). BUT I’ve got o
Quick pickles are one of the best flavor tools to keep on hand. They brighten up any dish - eggs, tacos, toast, salads, chili, sandwiches, pretty much anything that goes with vinegar. And, they’re so easy to make! (You don’t really even n

Let's Keep in Touch!

Get new recipes delivered right to your email. 

Thank you! Looking forward to staying in touch.

For now, head on over and say hi here. 

© Sarah Ward and of the dirt, 2017. Unauthorized use and/or duplication of the photographs and recipes without express and written permission from this blog’s author and/or owner is strictly prohibited. Excerpts and links may be used, provided that full and clear credit is given to Sarah Ward and of the dirt with appropriate and specific direction to the original content.